IoT Manufacturing Complete Guide: MQTT, OctoPrint, Klipper, AI Autonomous Control, and Print Farm Management in 2026
swiftwand swiftwand.ai

You’ve 3D printed your creation, but the layer lines on the surface are bothering you… support removal isn’t going well… you want a more beautiful finish… Sound familiar? The truth is, the quality of a 3D printed piece is determined by the “post-processing stage.” With proper post-processing, you can achieve smooth surfaces free of layer lines and professional-grade paint finishes. This article thoroughly explains everything from the basic post-processing workflow to effective methods for eliminating layer lines and beautiful painting techniques that will dramatically improve your work’s quality. After reading this, your 3D prints will evolve to the next level.
3D print post-processing is the process of transforming a rough, freshly printed piece into a beautifully finished work. Understanding and following these steps in order is the first step toward a beautiful finish.
3D printing technology is rapidly evolving, but due to the nature of layer-by-layer fabrication, layer lines inevitably appear. Support material is also needed for complex shapes. Without proper processing, even great designs will remain with that rough “3D-printed look.”
This workflow needs adjustment based on the piece’s purpose and material, but following this order generally produces efficient, beautiful results. The following sections detail each step’s specifics and techniques.
Support removal is the first step of post-processing, and this step significantly affects the final finish. Let’s understand the optimal removal method for each material.
For FDM (Fused Deposition Modeling): PLA — relatively brittle, so cutting with nippers is effective; soaking in warm water (around 60°C) softens it for easier removal. ABS — somewhat sticky, so carefully cut with a sharp knife; acetone vapor can also soften support sections. PETG — tough and resilient, cut at the base with nippers and smooth the remainder with files.
For SLA/DLP (Resin): Remove while still soft after washing for best efficiency. Using dedicated support cutters reduces the risk of damaging the model. Lightly moistening support attachment points with IPA (isopropyl alcohol) makes removal easier.
The most important thing during support removal is “not damaging the main model.” Cut from the base of supports, parallel to the model surface. Apply gentle force and work gradually. For fine details, remove in stages rather than all at once. Keep in mind that support marks can be covered in the later sanding stage. After removal, lightly sand any remaining support marks and fine debris to prepare for the next step.
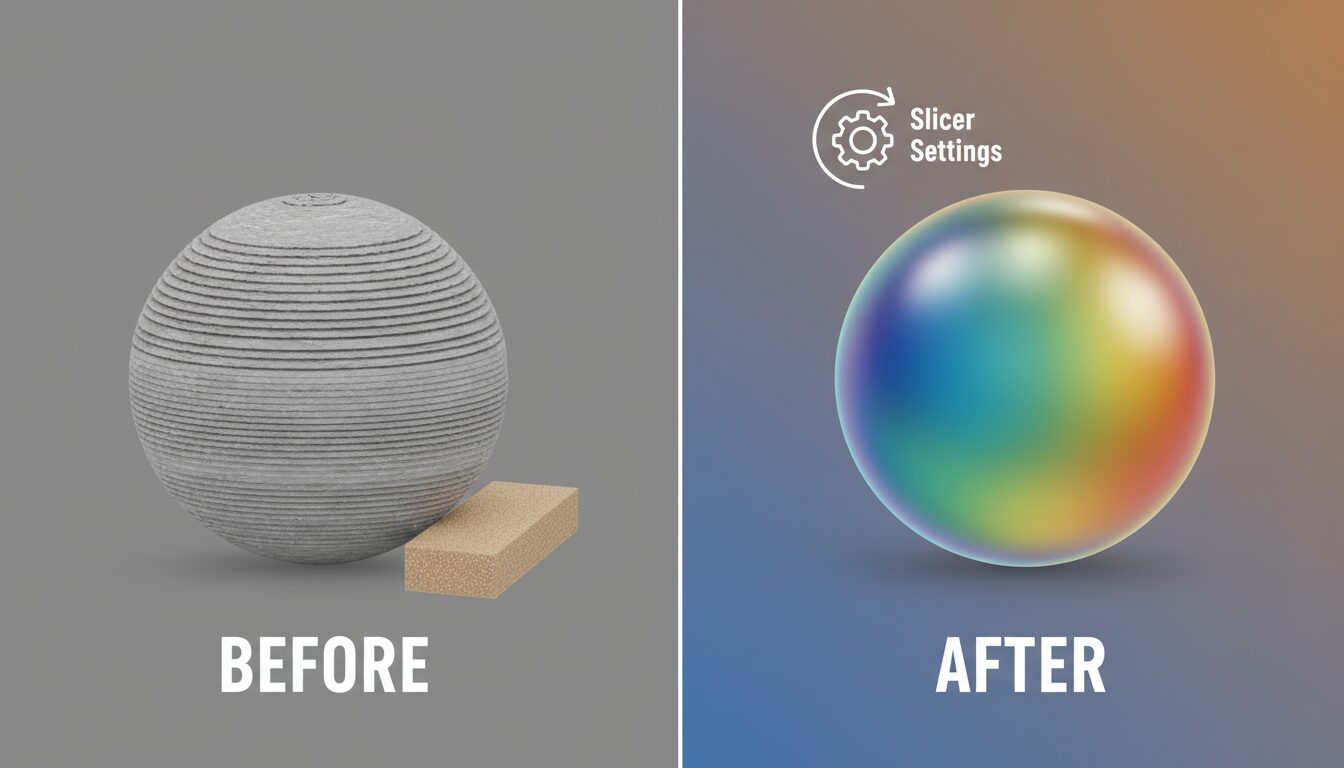
Eliminating the layer lines characteristic of 3D printing and achieving a smooth surface is a crucial step that dramatically improves your work’s texture. Choose the optimal method based on your material and desired finish.
The key to sanding is progressing gradually from coarse to fine: Coarse sanding (80-150 grit) removes major layer lines and support marks. Medium sanding (240-400 grit) evens out the surface. Fine sanding (600-1000 grit) improves smoothness. Finish sanding (1500+ grit) is used when you want a glossy finish. Sanding can be done dry or wet, with wet sanding (sanding while applying water) preventing fine particle scattering and producing a smoother result. Wet sanding is especially recommended for heat-sensitive materials like PLA to prevent friction-heat deformation.
For deep layer lines and dents, filler is effective: Model putty is ideal for fine scratches and layer line repair. Epoxy putty works for areas needing strength or filling large dents. Spray putty efficiently covers large areas. The basic procedure is: remove surface dirt and oils, apply filler thinly and evenly (using a spatula or card), allow complete drying (don’t rush this), sand excess filler smooth, and repeat 2-3 times as needed.
For some materials, chemical treatment is effective: ABS — acetone vapor treatment (expose to acetone vapor to melt the surface and even out layer lines). PLA — treatment with MEK (methyl ethyl ketone) or specialized PLA smoothers. Resin — UV post-curing and specialized smoothing solutions. Safety notes: Always work in well-ventilated areas with proper protective equipment (gloves, mask, safety glasses). Follow treatment times carefully (too long will lose fine details). For detailed pieces, apply chemical treatment only to specific areas.
Once surface treatment is complete, it’s time for painting. Proper painting gives 3D printed works not just color, but also texture and durability.
The critical step that determines painting success is primer application: Surface primer fills micro-scratches and irregularities to even out the surface. Plastic primer improves paint adhesion. Metallic base coat serves as the foundation for metallic finishes. Primer application tips: Multiple thin coats are the rule (thick coats cause drips and bumps). Allow sufficient drying time between layers. After the final layer dries, lightly smooth the surface with 1000+ grit sandpaper.
Different 3D print materials pair well with different paints: PLA/ABS/PETG — acrylic and lacquer paints work well. Resin — versatile compatibility with acrylic, enamel, and urethane paints. Nylon — most paints work after applying a dedicated primer. Painting method options: Brush painting is suited for detailed work and small pieces. Airbrush is ideal for gradients and uniform finishes. Spray cans efficiently cover large areas.
Techniques to enhance your work’s texture: Dry brushing highlights raised details for a three-dimensional effect. Washing creates shadows in recesses for added realism. Sponge painting produces irregular textures. Masking achieves complex patterns and color schemes.
Top coat as the final finish: Matte gives a natural texture suited for practical items and military models. Semi-gloss provides moderate shine for a realistic look. Gloss is perfect for vehicle models and shiny material representation. The top coat not only protects the paint but also defines the overall texture of your work. Choose the appropriate sheen based on your purpose and preference.
Since each 3D printing material has different characteristics, the post-processing approach must be adjusted accordingly. Here we explain the optimal methods for major materials.
PLA (Polylactic Acid): Hard but brittle, deforms at low temperatures, easy to sand. Recommended surface treatment: wet sanding, epoxy coating. Note: sensitive to heat, watch for friction-heat during sanding. Best paints: water-based acrylic, acrylic spray.
ABS (Acrylonitrile Butadiene Styrene): High impact resistance, slightly flexible. Recommended surface treatment: acetone vapor treatment, sanding. Note: ensure ventilation during acetone treatment, fine details may be lost. Best paints: lacquer, enamel.
PETG (Polyethylene Terephthalate Glycol): Tough and flexible, chemically stable. Recommended surface treatment: sanding, epoxy coating. Note: sticky nature means sanding takes longer. Best paints: most paints work after plastic primer.
Standard Resin: High detail, somewhat brittle, smooth surface. Recommended: UV post-curing, light sanding. Note: uncured resin is harmful — wear gloves. Best paints: most paints work, especially acrylics for ease of use.
Engineering Resin: High strength, heat and impact resistant. Recommended: dedicated post-processing solutions, mechanical polishing. Note: optimal methods vary by specific resin. Best paints: select based on application after dedicated primer.
TPU (Thermoplastic Polyurethane): Rubber-like flexibility and elasticity. Recommended: brush cleaning, dedicated coating. Note: difficult to sand, heat treatment risks deformation. Best paints: flexible vinyl paints, silicone paints.
Nylon: Tough, wear-resistant, slightly porous. Recommended: dyeing, sanding after sealer treatment. Note: absorbs moisture, so working in dry conditions is important. Best paints: most paints work after dedicated primer.
3D print post-processing requires time and effort, but by knowing efficiency tips, you can achieve beautiful results in less time. Let’s also cover key points for avoiding common mistakes.
Sanding mistakes and solutions: Detail loss from over-sanding — cover areas to protect with masking tape. Uneven sanding — use a sanding block and apply uniform pressure. Clogging — regularly replace sandpaper and use wet sanding.
Painting mistakes and solutions: Paint runs — apply in thin multiple coats and maintain proper distance. Uneven coverage — control temperature and humidity, use uniform strokes. Peeling — use appropriate primer and thoroughly degrease the surface. Dust adhesion — clean the work area before painting and temporarily isolate pieces after painting.
Post-processing is a field where “experience” particularly matters in 3D printing. Don’t give up after failures — learning from them will steadily improve your skills. We recommend starting with small pieces and gradually refining your techniques.
This article covered the entire post-processing flow for 3D printed works, from support removal to surface treatment and painting. With proper post-processing, you can achieve smooth surfaces free of layer lines and create professionally finished pieces.
Key takeaways: Remove supports carefully to avoid damaging the main model. Progress sanding from coarse to fine grit in stages. Choose surface treatment methods suited to your material. Primer (base coat) is a critical step that determines paint quality. Understand material properties and select appropriate paints and methods. Protect and refine texture with a top coat.
Post-processing requires time and effort, but your work’s quality improves dramatically in return. We recommend starting with simple pieces and gradually building your skills. Rather than trying to perfect every step at once, challenge yourself incrementally for steady skill improvement. The true appeal of 3D printing isn’t just creating physical objects from digital data — it’s the ability to finish them into unique, original works through post-processing. Use the techniques introduced in this article to take your 3D prints to the next level.
さらに詳しい情報はAll3DPでご覧いただけます。