Digital Twin 3D Printing Eliminates Failure: The Full Picture of Predictive Manufacturing by Siemens × NVIDIA
swiftwand swiftwand.ai
With just one printer, you can watch it yourself. However, the moment you add a second or third, human attention breaks down. While you’re monitoring Printer A, Printer B produces spaghetti, and Printer C wastes 3 hours on a filament runout. The essence of 3D print production AI is breaking through this “limit of human multitasking.” In other words, AI doesn’t replace humans — it extends one person’s management capacity to 5 or even 10 machines.
In the previous article (Why 90% Fail at AI 3D Printing Side Businesses), we covered how to use AI for market analysis to find “what sells.” This time, we’ll build a system for efficiently mass-producing those products across multiple printers. We’ll walk through the specific software and operational strategies that enable individual makers to create a “one-person factory.”
In the manufacturing world, factories that run unmanned are called “dark factories” — so named because they need no lighting since no humans are present. In 2026, the combination of open-source software and AI monitoring has made it possible to realize this concept in a single room of your home.

The biggest bottleneck in a 3D printing side business is printer uptime. A single printer can produce at most 2–4 items per day. Even at ¥2,000 (~$13) profit per item, monthly revenue caps at $800–$1,600.
However, reality is harsher. Print failures, post-processing, packaging, shipping, and customer service eat into your time, bringing actual utilization to around 60–70%. In other words, real monthly revenue from a single printer is $530–$1,130. After subtracting materials and expenses, the realistic profit is $200–$530 per month.
The need for multiple printers is obvious. However, the moment you add more machines, management complexity grows exponentially. Two printers might be manageable by eye, but beyond three, human simultaneous processing reaches its limit. While watching one, another fails. Breaking through this “management wall” is exactly what AI and farm management software accomplish.
Furthermore, here lies the greatest advantage of 3D print production AI. Printers keep working while you sleep. They keep running while you eat. The labor invested in building this “system that works when you’re not there” pays dividends over time as a compounding “time asset.” Specifically, this is what separates “trading time for money” from “building an income-generating system.”
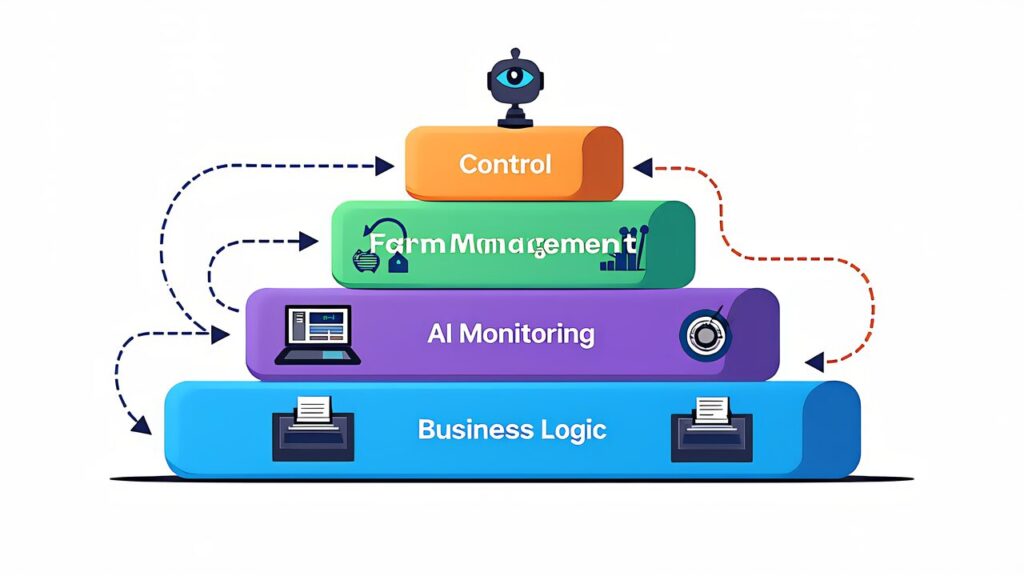
The foundation layer handles direct communication with each printer. OctoPrint is a web-based 3D printer management tool running on Raspberry Pi that enables remote print job submission, real-time monitoring, and G-code management from a browser. Furthermore, Klipper is firmware that offloads G-code processing to the Raspberry Pi’s CPU, enabling higher-speed and higher-precision printing.
The key point is that these two are not mutually exclusive. Klipper handles the firmware-level control, while OctoPrint (or its successor Moonraker + Mainsail/Fluidd) serves as the web interface. Specifically, for a Bambu Lab A1 mini-based farm, you can use Bambu’s proprietary LAN mode protocol, but OctoPrint/Klipper provides more flexibility for mixed-vendor environments.
FDM Monster is open-source farm management software that centrally controls multiple OctoPrint instances. In other words, instead of opening browser tabs for each printer, you manage all printers from a single dashboard. Job queuing, automatic distribution to idle printers, and batch operations become possible.
For Bambu Lab users, the Bambu Handy app and Bambu Studio’s multi-printer management features serve as the farm management layer. However, for farms with 5+ printers, FDM Monster’s queue management and automation capabilities offer significant advantages. The deciding factor is whether you need cross-vendor support or are committed to a single ecosystem.
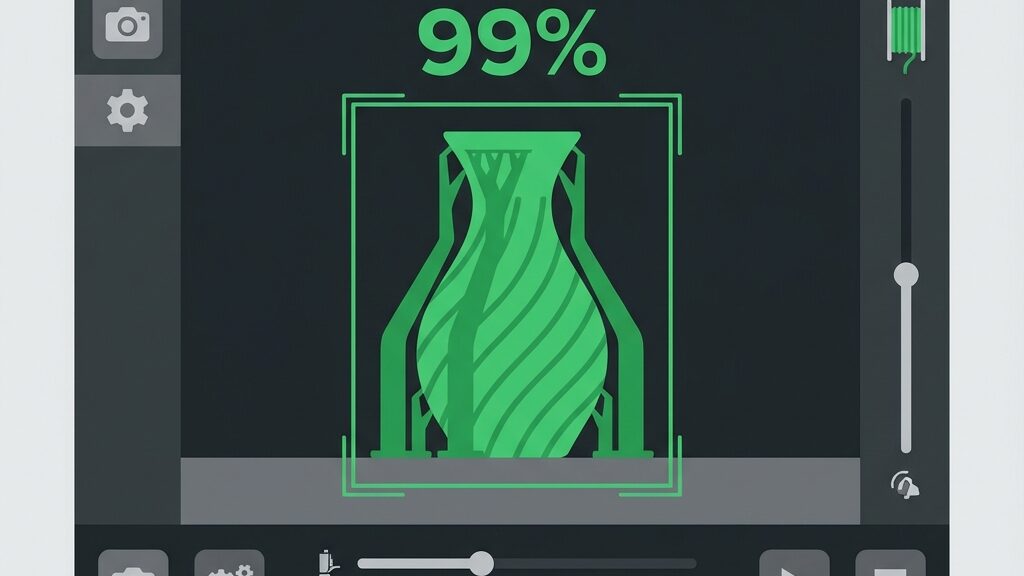
Obico (formerly The Spaghetti Detective) is an AI-powered print failure detection system. It analyzes webcam feeds in real-time and automatically pauses printing when anomalies like spaghetti, layer shifts, or bed adhesion failures are detected. In particular, this “failure detection AI” is the technology that makes unattended overnight operation possible.
The cloud Pro Plan costs $4/month for one printer, with additional printers at $2/month each. However, for farm operations, the self-hosted version is overwhelmingly advantageous. By building an Obico server on your own server (a Raspberry Pi 5 works fine), you get unlimited printers and zero subscription costs, with equivalent detection accuracy.
The reason Obico is critically important for a “one-person factory” is that it enables overnight unattended operation. Jobs started during the day continue running automatically at night, with automatic shutdown on failure. In the morning, you simply check the dashboard to review all printers’ overnight status. This extends daily printer uptime from 8 hours to 20 hours.
Let’s do a simple calculation. Running printers only during the 8 hours a human can monitor versus running 20 hours with AI monitoring means 2.5x more production from the same number of printers. With a 3-printer setup, the difference with and without AI monitoring can amount to tens of thousands of dollars annually. Getting this advantage for $0/month (self-hosted) makes it a no-brainer.
Setting up the self-hosted version has some technical hurdles, but procedures for deploying as a Docker container on Raspberry Pi 5 are well-documented. If you’re comfortable with Linux command-line operations, environment setup takes 1–2 hours.
The first three layers all automate the “making things” process. The top layer automates the “business processes” from order receipt to shipment. This layer, bridging technology and business, is the key to evolving a “one-person factory” into a truly autonomous business.
Specifically, the following automations become possible.
Building this layer requires programming skills, but with AI coding tools like Claude Code, even non-engineers can develop practical automation scripts. Furthermore, the combination of n8n (open-source workflow automation) and Claude’s API creates a powerful automation foundation achievable for approximately $20/month.

| Item | Unit Price | Qty | Subtotal |
|---|---|---|---|
| Bambu Lab A1 mini | ~$200–$325 | 3 | ~$600–$975 |
| Raspberry Pi 5 8GB (farm server + Obico) | ~$85–$107 | 1 | ~$85–$107 |
| USB Webcam (per printer) | ~$13 | 3 | ~$40 |
| Steel Rack (for 3 printers) | ~$33 | 1 | ~$33 |
| Total | ~$758–$1,155 |
| Software | Purpose | Cost |
|---|---|---|
| FDM Monster or Bambu Farm Manager | Centralized farm management | $0 |
| Obico (self-hosted) | AI failure detection | $0 |
| OctoPrint or Klipper | Printer control | $0 |
With a 3-printer setup running 20 hours/day with AI monitoring, approximately 6 items can be produced daily. At an average profit of ~$13 per item, that’s ~$80/day or approximately $2,400/month. After deducting material costs (~$400) and electricity (~$30), monthly profit is approximately $1,970.
This means even the maximum initial investment of ~$1,155 can be recovered in less than one month. However, this calculation assumes orders are already secured. In reality, the first 1–2 months should be considered a “ramp-up period” for building listings and accumulating reviews, making a 2–3 month payback timeline more realistic.

With this routine, a “one-person factory” powered by 3D print production AI can be operated with roughly 2 hours of actual work per day. The remaining time can be devoted to new product design, marketing, and customer support.
An often-overlooked key is the importance of “batching post-processing.” Rather than processing items one by one, gather all morning completions and process them together in the afternoon. Similarly, batch packaging and shipping at a fixed time daily. This “time batching” minimizes context-switching costs and dramatically reduces the feeling of busyness.
Additionally, filament replacement timing matters. With the A1 mini, a 1kg spool can print approximately 20–30 nameplates. Running 3 printers producing 6 items/day means replacement every 3–5 days. Establishing a “weekly maintenance day” on Sundays for bulk filament replenishment makes weekday operations significantly smoother.

Once 3-printer operations stabilize, the temptation to scale to 5 or 10 printers is strong. However, simply adding printers doesn’t grow profits linearly. Beyond a certain threshold, new challenges emerge.
Often overlooked, the first obstacle is physical power constraints. The Bambu Lab A1 mini draws approximately 150W at peak. Five simultaneous printers consume 750W; ten reach 1,500W. In a typical Japanese apartment, a single circuit handles 1,500W (15A). Therefore, running 10 printers on one circuit risks tripping breakers.
The practical solution is distributing printers across multiple circuits. Specifically, placing 3–4 printers per room and using different circuits keeps you within safe limits. Furthermore, using smart plugs with power monitoring (such as TP-Link Tapo P110) to track real-time power consumption per printer provides data-driven management.
With 5+ printers, “the same G-code produces different quality on different printers” becomes a real problem. Even identical models develop individual quirks due to belt tension, nozzle wear, and build plate flatness differences.
The countermeasure is creating “printer profiles” for each machine. Specifically, calibrate each printer individually and manage per-printer adjustments (Z-offset, flow rate, temperature) as configuration files. In particular, maintaining a “calibration log” that records calibration results with dates enables trend-based predictive maintenance.
For a 3-printer setup, maintenance is manageable ad-hoc. However, at 5+ printers, systematic maintenance scheduling becomes essential. Nozzle replacement every 500–1,000 hours, belt tension checks every 200 hours, and lubrication at regular intervals — without tracking these per-printer, unexpected downtime will eat into your production capacity.
The recommended approach is a simple spreadsheet tracking “printer ID, maintenance item, date of last maintenance, next scheduled date.” Similarly, using a Google Calendar for maintenance schedules makes management accessible even for solo operators. This seemingly mundane maintenance management determines whether you can sustainably scale beyond 5 printers.
The essence of building a 3D print production AI system is simple: separating “the time you work” from “the time the system works.” A human’s daily working capacity is limited to about 8 hours. However, an AI-monitored printer farm can produce for 20 hours. This 2.5x time leverage is the source of a solo operator’s competitive advantage.
The 4-layer tech stack — printer control, farm management, AI monitoring, and business logic — can be built almost entirely with open-source and free tools. Furthermore, the initial investment of ~$758–$1,155 for a 3-printer setup is recoverable within 2–3 months.
Start with 3 printers. Stabilize operations over 2–3 months. Then, if demand warrants it, scale while addressing the power, quality, and maintenance walls. This step-by-step approach is the most reliable path for a solo maker to build a sustainable “one-person factory.”
Moreover, if you haven’t yet identified what products to sell, start with market analysis: Why 90% Fail at AI 3D Printing Side Businesses: Market Analysis Guide.