Take the First Step! How to Get Started with 3D Printing and Practical Applications
swiftwand swiftwand.ai
For example, if you’ve been thinking “3D printers seem interesting, but they look too complicated,” that perception stopped being accurate in 2024.
However, 3D printers in 2026 are as simple as smartphones. First, open the box, plug it in, and select a model from the app. In other words, AI auto-calibration, AI camera monitoring, and AI flow correction. Consequently, these three AI features have completely made the notion that “3D printers are difficult” a thing of the past. The Bambu Lab A1 mini takes less than 30 minutes from unboxing to completing your first print.
Specifically, this article is the definitive guide to “getting started with 3D printing.” From the three printing principles to the revolution brought by AI automation. Furthermore, realistic numbers on space, noise, and cost, along with a roadmap of what you can accomplish in your first 30 days. And which starter kits to choose in 2026. In particular, this was written for complete beginners starting from zero knowledge.
The mechanism of 3D printers boils down to three actions. “Melt (or liquefy) the material,” “solidify it into a specific shape,” and “stack it layer by layer.” In other words, by repeating these three steps, digital data transforms into physical objects.
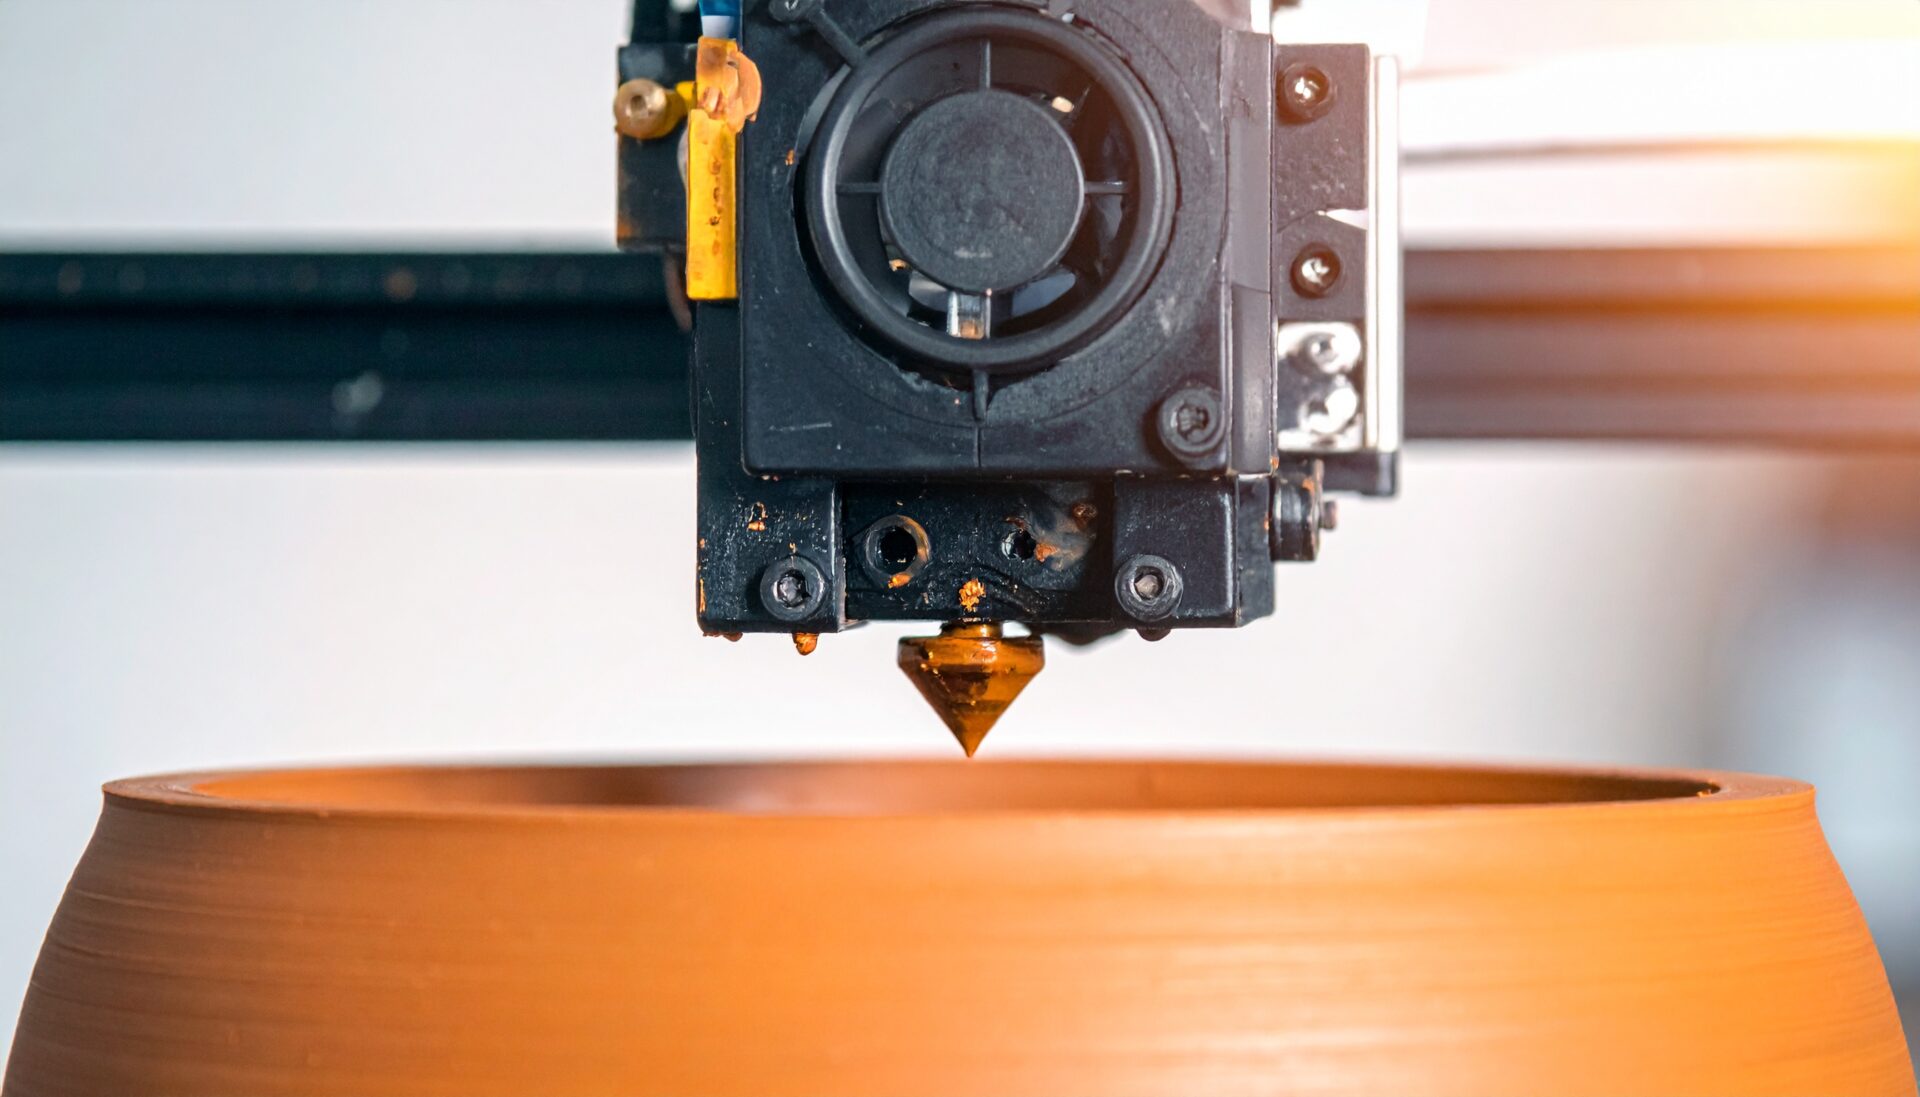
First, FDM (Fused Deposition Modeling) is the most widely used home 3D printer technology. It heats 1.75mm diameter plastic filament to 200-230°C in a heater block to melt it. The molten material is then extruded through a nozzle (typically 0.4mm diameter) and stacked layer by layer. For example, imagine squeezing out soft-serve ice cream. Layer height can be set between 0.08mm and 0.32mm. Consequently, thinner layers produce smoother finishes, but printing time increases.
In particular, the reasons why FDM is ideal for beginners are clear. First, material costs are overwhelmingly low. PLA filament costs around 1,500-3,000 yen per kilogram. In other words, the material cost per smartphone case is just 30-50 yen. Printing failures can simply be recycled as material for the next attempt, so the psychological barrier to experimentation is very low. Additionally, the most common material, PLA, is a biodegradable plastic derived from plants like corn, producing minimal odor during printing. You can use it comfortably even in a living room or bedroom. Many beginners worry about ventilation, but with PLA, you only need normal room ventilation.
Additionally, PLA is not the only material available. PETG with excellent heat and impact resistance, flexible TPU, and ABS and nylon with high mechanical strength. The ability to switch between a wide range of filaments depending on the application is also a major advantage of FDM.
Next, SLA (Stereolithography) uses UV light to cure liquid UV-curable resin. A vat is filled with liquid resin, and UV light is projected from the bottom to cure it layer by layer. Unlike FDM’s “lines,” it cures in “surfaces.” In other words, XY resolution reaches 0.01-0.05mm. It can express finer details than the thickness of a human hair (approximately 0.08mm). Therefore, it is overwhelmingly dominant in applications requiring precision, such as figurine facial expressions, jewelry prototypes, and dental models.
However, there are several points for beginners to note. First, for example, uncured resin irritates the skin, so nitrile gloves and safety glasses are essential. Additionally, printed objects require post-processing: washing in IPA (isopropyl alcohol) and secondary UV curing. Cleaning solution management and waste liquid disposal are also required. Therefore, compared to FDM, there is additional “kitchen chemistry” effort involved.
Furthermore, the running cost of resin is higher than filament. Standard resin costs around 3,000-5,000 yen per liter, and consumption tends to be higher than FDM.
Furthermore, DLP (Digital Light Processing) is an evolution of SLA. While SLA traces with a laser point by point, DLP projects an entire layer’s image at once using a high-resolution projector. This means print time per layer is constant. Consequently, regardless of whether one part or 50 parts fill the build plate, the time per layer remains the same. This characteristic makes DLP suitable for batch production of small parts.
The beginner’s conclusion: As your first step in getting started with 3D printing, first choose the FDM method. It has the lowest cost, simplest operation, and widest range of applications. However, the cost and effort of SLA/DLP are within the beginner range. If you already have specific goals like figurines, miniatures, or jewelry, starting directly with resin printing is also a valid option.
In other words, when you used to search for how to get started with 3D printing, bed leveling (adjusting the print bed to be level) alone would show 30-minute videos. Manually adjusting four screws using a sheet of paper as reference. Aligning the gap between nozzle and bed to 0.1mm precision. This “ritual” has been the biggest barrier that caused many beginners to give up.
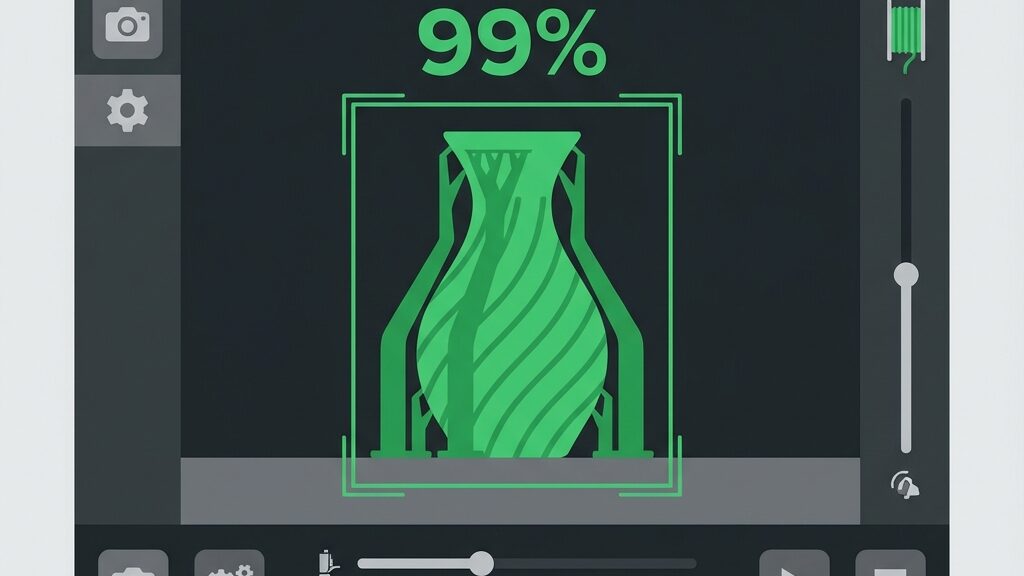
For example, the major printers of 2026 have completely solved this problem with AI. As detailed in AI LiDAR and Smart Slicing Revolution, the LiDAR sensor on the Bambu Lab A1 mini automatically scans the entire bed surface. In other words, it generates a correction map with 0.01mm precision. All the user has to do is “press the button once.”
Creality SPARKX i7 also adopts a similar approach. Similarly, SPARKX i7 incorporates AI camera monitoring in addition to auto-leveling, as introduced in SPARKX i7’s AI-Monitored 4-Color Printing. From unboxing to first print, no tools are required.
Specifically, flow correction is the adjustment that optimizes the amount of resin extruded from the nozzle. Too much flow creates bumpy surfaces, while too little creates gaps between layers reducing strength. What makes this adjustment tricky is that optimal values differ subtly by filament manufacturer and color. White PLA and black PLA have different pigment compositions. Even printing at the same temperature and speed produces different extrusion amounts. Previously, multiple test prints (calibration cubes, etc.) were needed. Measuring dimensions with calipers and manually fine-tuning was required.
Consequently, the latest AI-equipped printers let the machine handle this craftsmanship. In other words, during the first few layers of printing, flow volume is automatically measured by LiDAR sensor and corrections are applied in real-time. The calibration work that used to take an hour every time you changed filament is completely eliminated. Users just “load new filament and press start.” The printer finds the optimal extrusion amount on its own.
For example, FDM printing typically takes several hours to over ten hours. Printing a 20cm model at standard quality takes 8-12 hours. Not everyone can monitor the printer all that time. When a printing failure called “spaghetti” (when a layer shifts and filament tangles randomly) occurs, material, time, and electricity are all wasted.
In particular, as detailed in “Never Need to Babysit Again: AI Agent Monitoring Your Printer 24/7,” the printer’s built-in camera (or a Raspberry Pi and USB camera combination) analyzes printing footage in real-time. When signs of spaghettification are detected, printing is automatically paused. Users receive smartphone notifications and can decide remotely whether to “resume” or “cancel.” This AI camera monitoring has changed the concept of 3D printing from “something you must watch” to “something you can leave running.”
Furthermore, many people starting with 3D printing share common concerns: “Do I have enough space?” “Won’t it be too noisy?” “How much does it really cost?” This section answers with concrete numbers.
Specifically, the Bambu Lab A1 mini’s footprint is 347mm × 315mm. Roughly the size of an A3 sheet of paper. It fits on a study desk, bookshelf, or even a kitchen counter. The build volume is 180mm × 180mm × 180mm. Sufficient for daily items, smartphone accessories, and tabletop gaming miniatures.
Similarly, the Creality SPARKX i7 is slightly larger. With a build volume of 260mm × 260mm × 255mm, the footprint also increases. However, it still fits on a desk of about 50cm × 50cm. If you need to print large items like cosplay helmets or drone frames, the larger build volume is an advantage.
Additionally, the A1 mini’s operating noise is about 49dB. This is roughly the same level as a quiet conversation or library background noise. The SPARKX i7 is slightly louder at about 55dB, comparable to an air conditioner. Neither level would cause problems in an apartment late at night. Specifically, SLA/DLP printers are even quieter. Since there are no high-speed moving parts, operating noise stays around 40-45dB.
Furthermore, the breakdown for getting started with a 3D printer is as follows. The Bambu Lab A1 mini costs about 36,000 yen for the base unit. PLA filament is 1,500-3,000 yen per kg. A maintenance kit (nozzles, lubricant) costs about 2,000 yen. The total is approximately 40,000-42,000 yen. Monthly electricity costs are about 200-500 yen even with daily use. Material cost per print averages 30-100 yen. In other words, the initial investment is comparable to a gaming console, while running costs are virtually negligible.
Consequently, here are two beginner-friendly starter kits selected based on all the information above.
Specifically, the A1 mini is the overwhelmingly best choice for complete beginners. The price-to-performance ratio is exceptional. AI auto-calibration, AI camera monitoring, and AI flow correction are all standard. The compact body fits anywhere. Printing is quiet at 49dB. The companion app Bambu Studio is beginner-friendly. Additionally, the AMS lite (auto material system) allows multi-color printing with up to 4 colors. Two-color logos, gradient vases, and multi-color figurines become possible. Overall, starting with 40,000 yen covers everything.
Similarly, the Creality SPARKX i7 is perfect for those who want more advanced capabilities from the start. The build volume of 260mm × 260mm × 255mm is about twice that of the A1 mini, supporting larger projects. It offers AI camera monitoring, auto-leveling, and multi-color printing with up to 4 colors. Price is higher at around 60,000 yen, but it eliminates the need to upgrade later.
For example, the core of getting started with 3D printing is “what to tackle first.” Below is a roadmap for progressively building skills over 30 days from purchase.
In particular, the first week focuses on “printing something and building a sense of accomplishment.”
Furthermore, at this stage there’s no need to adjust settings. The manufacturer’s recommended presets produce perfectly good prints.
Additionally, from week two, you’ll learn how to control print “quality.”
Additionally, the third week is time to explore beyond the default filament.
In other words, by week four you move from “printing others’ models” to “creating your own.”
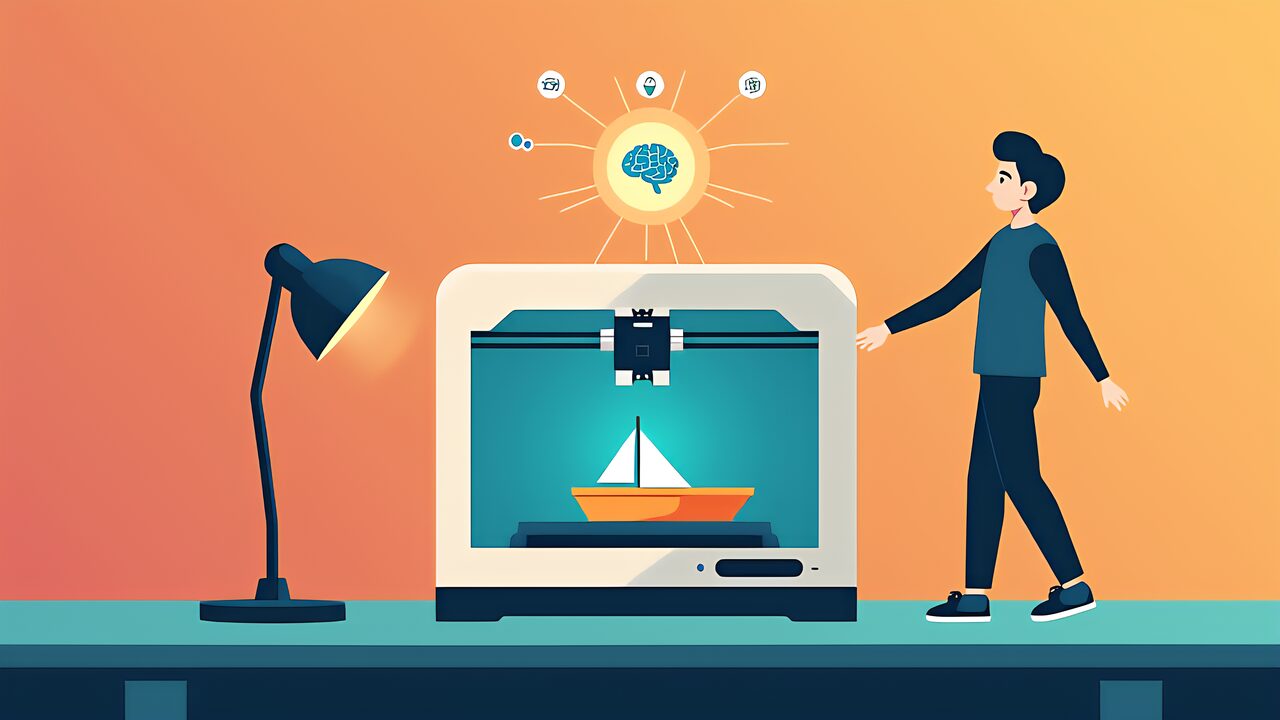
Furthermore, the meaning of “getting started with 3D printing” has fundamentally changed in 2026. It’s no longer “study, research, prepare, then finally start.” It’s “turn on the power, press a button, and create something that didn’t exist before.”
Additionally, the bed leveling, flow calibration, temperature settings, retraction amounts, bed temperature, and first layer speed that once required hours of adjustment have all been delegated to AI. What remains for humans to do is “decide what to make.” The 30-day roadmap in this article is just a guide. Many people will find their own path and start creating original works by the second week.
Finally, get a 3D printer. Turn on the power. Press a button. In 30 minutes, your first creation will be in your hands. That small plastic object will be the starting point for your “making” journey.