Continuous Fiber 3D Printing AI Path Planning: Achieving Carbon-Grade Strength
swiftwand swiftwand.ai
undefined
When using new filament, the biggest question is “what temperature should I print at?” Manufacturer ranges like “190–230°C” span 40 degrees. Orca Slicer’s calibration tools solve this automatically.
Orca Slicer’s calibration features handle this problem with three key tests.
Here’s the step-by-step process. First, launch Orca Slicer. Then select your printer and filament profiles. Go to “Calibration” → “Temperature” in the top menu. Enter start and end temperatures. For PLA, use 230°C start and 190°C end. For PETG, use 250°C start and 220°C end. The default 5°C step size works fine. Click “OK” to auto-generate the temperature tower model.
After slicing, send it to your printer. A PLA temperature tower takes about 30–40 minutes. Evaluate each block on four criteria: (1) surface smoothness, (2) bridge performance, (3) stringing, and (4) overhang quality.
The block with the best overall balance indicates your optimal temperature. Record this value for the next calibration step.
After determining temperature, calibrate flow rate (extrusion multiplier). Select “Flow Rate” from the “Calibration” menu. This runs in two stages: Coarse and Fine.
The Coarse test prints nine thin square plates with flow rates varying from -20% to +20% in 5% increments. Choose the plate with the smoothest surface. The Fine test then narrows the range around your selection in 2% increments. This process takes about 30 minutes total.
Pressure Advance compensates for excess filament at corners during high-speed printing. Select “PA” from the “Calibration” menu. The test prints a zigzag pattern with varying PA values. Choose the line where corners are sharpest without gaps.
Without proper PA, high-speed printing (150mm/s+) creates bulges or gaps at corners. Beginners can skip PA initially and focus on temperature and flow. Once you start printing at 150mm/s or higher, PA calibration becomes essential.
Importantly, Orca Slicer lets you save calibration results directly to filament profiles. Open the relevant profile in “Filament Settings” and enter your optimized nozzle temperature, flow rate, and PA value.
Create separate profiles for each brand and color. For example, “PolyTerra PLA White” and “PolyTerra PLA Matte Black” as individual profiles ensure optimal settings load automatically when switching filaments.
All three calibration tests (temperature, flow, PA) take about 1–1.5 hours total. Running these whenever you buy new filament prevents failed prints and wasted material.
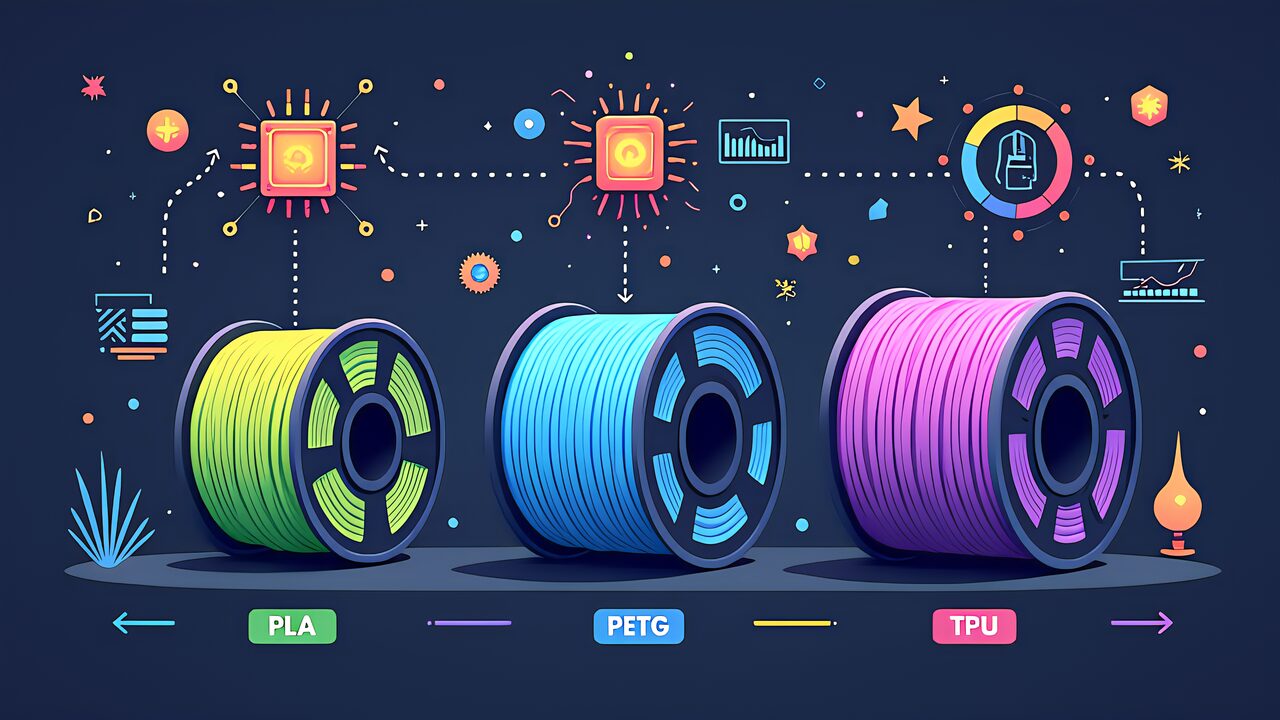
How to choose 3D printer filament may seem complex, but the beginner strategy is simple.
ABS is unnecessary until you own an enclosed printer. Advanced materials like Nylon and PC (Polycarbonate) require 300°C+ nozzle temperatures and sophisticated temperature management. These are firmly in the “future” category for beginners.
Start with PLA today. When you hit its limits, PETG awaits. When you need flexibility, TPU is ready. These three materials cover 90% of home 3D printing needs.
Tomorrow in Part 4 of this series, we cover “Your First 3D Print.” From the moment your printer and PLA arrive, we’ll guide you through completing your first project with zero failures using AI-assisted printing.