Agent Teams vs Subagents Complete Comparison 2026 — Choosing Between Two Multi-Agent Patterns
swiftwand swiftwand.ai
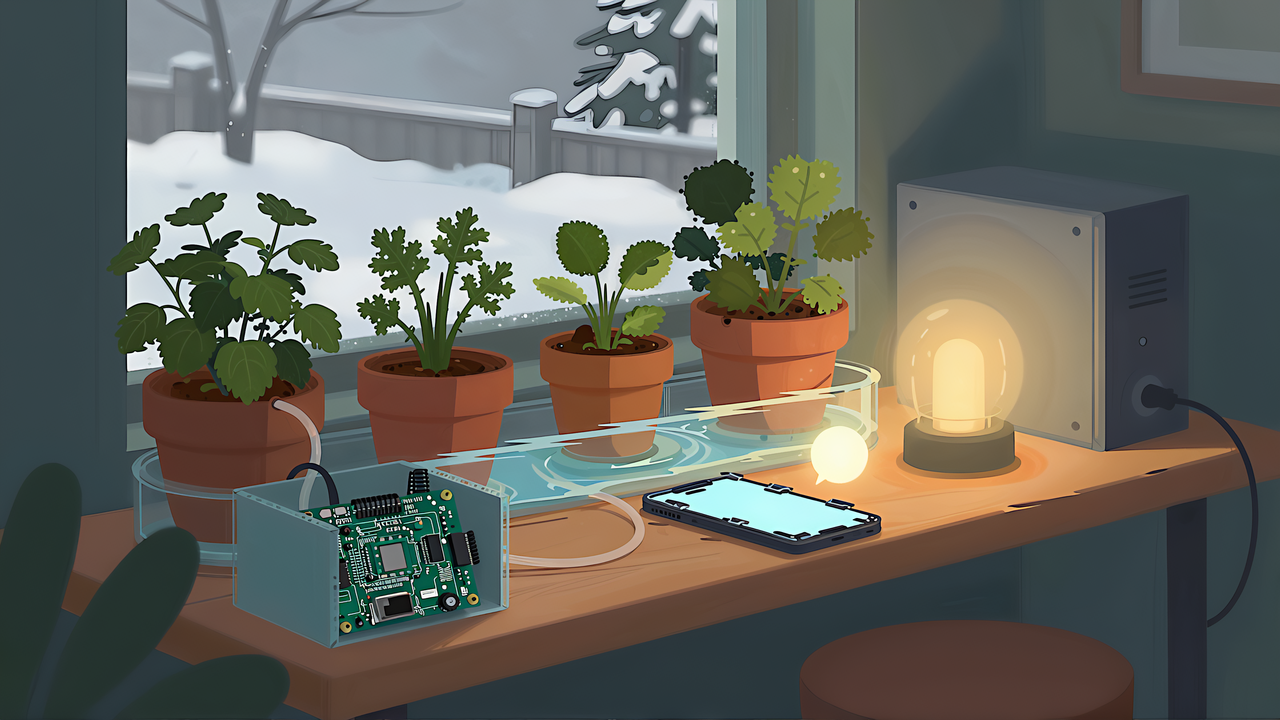
You usually notice a pot has dried out only after the leaves wilt. A soil moisture sensor turns dryness into a number, but if you never go look at the number, nothing changes. So you think about Home Assistant watering automation, and a different worry appears. What happens to the floor if the pump does not stop? If the server restarts halfway through, who turns the pump off?
This article contains affiliate links. As an Amazon Associate, we earn from qualifying purchases.
This Home Assistant watering guide lays out a procedure that deals with those two worries in turn. First you build an automation that only notifies your phone when the soil is dry, and move to pump control once that is stable. At the pump stage, the central design rule is not to leave stopping the pump to Home Assistant alone. Finally, it covers using a local LLM to summarize plant status into readable notifications, and the limits of doing so.
We did not run this setup on real hardware. The steps are based on the official Home Assistant and ESPHome documentation and third-party build write-ups, linked where relevant. Versions are as of September 2026 (the latest Home Assistant release is 2026.9.4, published 2026-09-27).
Watering automation fails in two broad ways. One is overwatering: the pump does not stop, the same automation fires repeatedly, or the sensor keeps reporting dry. The other is failing to notice: a notification arrives only once, or so often that you start ignoring it.
The first usually comes from having the “stop the pump” command in only one place. If a Home Assistant automation says “turn pump on, wait 30 seconds, turn pump off,” the stop command exists only inside Home Assistant’s wait. If Home Assistant restarts during the wait, or Wi-Fi drops and the command never reaches the microcontroller, the pump stays on. A reply in a Home Assistant Community watering build thread mentions setting a maximum run time on the ESPHome side in case the connection to Home Assistant is lost.
The second comes from building without understanding trigger behavior. The Home Assistant numeric state trigger fires when a value crosses a threshold and does not fire again while it stays on the same side. A “moisture below 30” notification arrives once, at the moment of crossing. Miss it and no further notification comes even though the soil stays dry.
One more property matters. A numeric state trigger can have a for condition (“stay below the threshold for a set time”), but the documentation states that the for timer resets when Home Assistant restarts or automations reload. For notifications, that does not just mean a delay. The trigger fires on crossing, so if the value was already below the threshold at the restart or reload, it will not fire until the value rises above and falls below again. You can miss the notification. If you use the same mechanism to time the pump, a reset erases the plan to stop the pump altogether. That is why this article splits the work into stages and puts the pump stop on the microcontroller.
Watering automation with Home Assistant is easiest to reason about in three layers.
Build only the measure and decide layers first and leave act for later. During the notification-only period, watch how fast the value falls, how far it recovers right after watering and whether it bounces around the threshold. That lets you set the threshold and run time for the pump stage from evidence.
The official installation page currently lists two methods: Home Assistant Operating System and Home Assistant Container. The recommended one is the OS; Container cannot use Apps (formerly add-ons). If you want to run the ESPHome dashboard inside Home Assistant, or put local LLM software on the same machine, the OS version shortens the steps.
Settle electrical scope up front too. This article covers only small pumps powered by USB or 12 V DC or less. It does not cover switching mains-powered pumps with a relay. Wiring household voltage next to water carries a far worse failure mode than low voltage.
The first automation sends a notification to the Home Assistant Companion App on your phone when soil moisture stays below a threshold for a while. The Companion App is the official app (iOS, Android, and macOS), and each device signed in to it appears as a notification target named notify.mobile_app_ followed by the device ID. A notification needs at least a message.
In YAML it looks like this. Entity names, the threshold and times are examples to show the format; set the threshold from values you confirm with your sensor in dry and wet soil.
alias: Notify when the pot gets dry
triggers:
  - trigger: numeric_state
    entity_id: sensor.monstera_soil_moisture
    below: 30
    for:
      minutes: 30
  - trigger: homeassistant
    event: start
conditions:
  - condition: numeric_state
    entity_id: sensor.monstera_soil_moisture
    below: 30
actions:
  - action: notify.mobile_app_my_phone
    data:
      title: Time to water
      message: >-
        Monstera soil moisture has dropped to {{ states('sensor.monstera_soil_moisture') }}%.
The for condition prevents repeated notifications when the value hovers near the threshold. Its default is 00:00:00, meaning the trigger fires the moment the value crosses. Requiring 30 minutes below the threshold filters out brief dips. As noted above, the timer resets on restart, and if the soil is already dry at that point the numeric state trigger will not fire. So a second trigger, the homeassistant trigger with event: start, runs when Home Assistant finishes starting, and the condition checks whether the value is still below 30 before notifying. Right after startup, ESPHome devices may not be connected yet and values may be unavailable. To reduce misses further, you can add a time_pattern trigger that runs every hour in the same way (in which case the notification repeats at that interval while the soil is dry).
If you build it in the automation editor, the trigger list shows purpose-specific triggers for each measured quantity. The documentation recommends using a trigger named for the quantity when one exists, and there are triggers and conditions for moisture. The numeric state trigger remains available as a general trigger, so the YAML above is fine.
At this stage, confirm three things:
The third point feeds directly into whether you need a pump at all. If you manage to water after notifications, ending with notifications only is a perfectly reasonable choice.
As pots multiply, the Home Assistant Plant Monitor integration (YAML key plant:) makes management easier by grouping readings per plant. It bundles moisture, conductivity, brightness, temperature and battery into one plant, each with a minimum and maximum (battery has a minimum only). When any reading goes out of range, the plant state becomes problem. It is configured in configuration.yaml.
plant:
  monstera:
    sensors:
      moisture: sensor.monstera_soil_moisture
      temperature: sensor.living_room_temperature
      brightness: sensor.window_illuminance
    min_moisture: 20
    max_moisture: 60
The min_moisture of 20 and max_moisture of 60 used here are simply the Plant Monitor defaults. The conductivity defaults are 500 to 3000, and the brightness evaluation period check_days defaults to 3 days. These are integration defaults, not values suited to any particular plant. Adjust them to the species, pot size and your sensor calibration.
Brightness is judged in a particular way. Because it swings between day and night, Plant Monitor reports problem only when the maximum over the past few days is below min_brightness, not based on the current value. It catches a winter windowsill where even the brightest time of day is not enough, and a reading of 0 at night is not a problem.
Plant Monitor also simplifies notifications. Instead of separate automations watching moisture, temperature and brightness thresholds, one automation can notify when the plant entity turns problem. Which reading caused it is stored in the plant entity attributes, so the message can say so. The local LLM summary described later works best with this bundled state as input.
If you do not have a temperature sensor for Plant Monitor, a small Bluetooth thermo-hygrometer that Home Assistant can read through its Govee integration is an easy option.

 ポチップ
ポチップOnce notifications have shown you the threshold and drying speed, move on to pump control. From here the baseline is switching the pump with ESPHome flashed on an ESP32. Smart plugs are covered later.
The minimal ESPHome setup for a pump is a GPIO switch. An ESP32 GPIO drives a relay or MOSFET module, and a low-voltage pump connects beyond it. An ESP32 pin cannot supply pump current directly, so always put a switching module in between.
switch:
  - platform: gpio
    pin: GPIO26
    name: "Water Pump"
    id: water_pump
    restore_mode: ALWAYS_OFF
    on_turn_on:
      - delay: 20s
      - switch.turn_off: water_pump
This config includes two safeguards.
The first is restore_mode: ALWAYS_OFF. An ESPHome switch can set its state at boot with restore_mode. ALWAYS_OFF means always off at startup, and per the ESPHome documentation it is the default. Writing it is redundant, but it is worth stating in the config that the pump will not spin up on its own after a power cut or restart.
The second is the delay and switch.turn_off inside on_turn_on. When the switch turns on, the microcontroller turns itself off after a set time. The official GPIO switch page shows an example of using on_turn_on to make a momentary switch (500 ms in the official example). The same mechanism serves as the pump’s maximum run time. ESPHome delay counts time in the background without blocking, so sensor reads and other work continue while it waits.
The 20s above shows the format and is not a recommendation. The right time depends entirely on pot size, pump flow and tube diameter. In practice, run the pump by hand over a tray, time how long it takes to deliver the water you need, and set the maximum run time a little above one watering. Then have the Home Assistant automation stop the pump sooner than that. Normally Home Assistant stops it; only when Home Assistant fails does the microcontroller stop it. That gives you two independent stops.
An ESPHome node that only switches a pump runs fine on a small ESP32 board. This one fits easily in a small enclosure.
 ポチップ
ポチップA maximum run time alone does not prevent running the pump with an empty reservoir. Many submersible pumps are designed to run under water: DFRobot notes on the FIT0563 page that the pump must be used only in water, and Adafruit says its 3 V submersible pump must always be submerged and primed. Manufacturers do not state how many seconds of dry running would damage the pump, so design on the premise of never running dry.
To do that, add a water level sensor to the reservoir and tie it to the pump. The simplest is a float switch; its contact changes when the level falls, so an ESP32 GPIO can read it directly. The ESPHome Cookbook has an example that turns off the pump switch when the float contact closes (Sonoff fish pond pump; note that it switches mains with a Sonoff Basic and dates from ESPHome 1.10.1, so we borrow only the stopping logic, not the wiring).
The same idea for a low-voltage pump:
binary_sensor:
  - platform: gpio
    name: "Tank Water Low"
    id: tank_low
    pin:
      number: GPIO27
      mode:
        input: true
        pullup: true
    on_press:
      - switch.turn_off: water_pump

switch:
  - platform: gpio
    pin: GPIO26
    name: "Water Pump"
    id: water_pump
    restore_mode: ALWAYS_OFF
    on_turn_on:
      - if:
          condition:
            binary_sensor.is_on: tank_low
          then:
            - switch.turn_off: water_pump
      - delay: 20s
      - switch.turn_off: water_pump
When the float contact turns on (water is low), the pump stops at that moment. The pump also checks the level right after turning on and stops immediately if it is already low. With both in place, the microcontroller prevents dry running even if Home Assistant turns the pump on with no water. Which way the float contact closes depends on the product and mounting, so check on the real part whether you need inverted.
If you use an optical or capacitive level sensor, watch the output voltage. The DFRobot SEN0204 non-contact sensor runs on 5–24 V DC with a 500 ms response and IP67 rating, but its specification says the high output equals the supply voltage. At 5 V or more it may not suit the ESP32’s 3.3 V inputs directly, so check the output voltage before connecting and add level shifting if needed.
The other brake is a limit on how many times the pump can run in a period. If a sensor slips out of the soil and reports dry, or its wire breaks, the automation keeps deciding the soil is dry and runs the pump again and again. The ESP32 watering project published on GitHub (rasclatt-dot-com ESP32-Plant-Waterer-for-ESPHome) counts how many times the watering automation ran in the last four hours with a Home Assistant history_stats sensor and uses it as a condition to prevent overwatering. Add the run count limit as a condition in Home Assistant.
With those mechanisms in place, write the Home Assistant automation. The flow is: dryness persists, check water level and run count, turn the pump on, wait, turn it off, notify. If either check fails, do not run the pump and send a notice saying so. The checks sit in an if inside actions rather than in the automation conditions for that reason: in conditions, a failed check just ends the automation silently.
alias: Water the pot when dry
mode: single
triggers:
  - trigger: numeric_state
    entity_id: sensor.monstera_soil_moisture
    below: 30
    for:
      minutes: 30
actions:
  - if:
      - condition: state
        entity_id: binary_sensor.tank_water_low
        state: "off"
      - condition: numeric_state
        entity_id: sensor.pump_runs_last_4h
        below: 2
    then:
      - action: switch.turn_on
        target:
          entity_id: switch.water_pump
      - delay:
          seconds: 15
      - action: switch.turn_off
        target:
          entity_id: switch.water_pump
      - action: notify.mobile_app_my_phone
        data:
          message: Watered the monstera.
      - delay:
          minutes: 20
      - if:
          - condition: numeric_state
            entity_id: sensor.monstera_soil_moisture
            below: 30
        then:
          - action: notify.mobile_app_my_phone
            data:
              title: Moisture did not recover after watering
              message: >-
                20 minutes after watering, soil moisture is still
                {{ states('sensor.monstera_soil_moisture') }}%.
                Check whether the sensor has come out of the soil.
    else:
      - action: notify.mobile_app_my_phone
        data:
          title: Watering skipped
          message: >-
            The pump did not run because of low tank water
            ({{ states('binary_sensor.tank_water_low') }}) or the
            4-hour run limit ({{ states('sensor.pump_runs_last_4h') }}).
sensor.pump_runs_last_4h is the history_stats sensor described above. Adding the following to configuration.yaml creates a sensor that counts how many times the pump switch was on in the last four hours.
sensor:
  - platform: history_stats
    name: pump_runs_last_4h
    entity_id: switch.water_pump
    state: "on"
    type: count
    end: "{{ now() }}"
    duration:
      hours: 4
history_stats takes two of start, end and duration; here end and duration express “the last four hours.” type: count counts how many times the entity was in the given state during the period. The documentation notes that this differs from the number of times it was turned on (state transitions): if the entity was already on at the start of the period, that counts as one. A pump running across the four-hour boundary may be counted once extra, but as a limit that errs toward stopping. Per the documentation, the sensor updates when the source entity changes, or every minute otherwise.
switch.water_pump and binary_sensor.tank_water_low are illustrative IDs. Look up the actual IDs of the entities your ESPHome device registered in Home Assistant and replace them. All numbers here are examples. Keep the Home Assistant wait (15 seconds in the example) shorter than the microcontroller’s maximum run time (20 seconds).
The 20-minute check after watering covers a sensor that has slipped out of the soil. A loose sensor keeps reporting dry, but the numeric state trigger does not refire while the value stays on the same side, so this automation waters once and then never runs again, never reaching the run limit. Without a notice that the value did not recover, you would not notice the problem. The 20 minutes is also an example; measure during the notification stage how long the value takes to change as water spreads. This second wait is also lost on restart, but what is lost is only the follow-up notice; the pump has already stopped.
Consider what happens if Home Assistant restarts during this automation. A restart during the delay aborts the run, and switch.turn_off never executes. The microcontroller’s delay, however, keeps counting inside the ESP32, so the pump stops at the maximum run time. The same holds if Wi-Fi drops and the off command never arrives. Conversely, if the ESP32 restarts after a power cut, restore_mode: ALWAYS_OFF turns the switch off as soon as ESPHome is running.
This double stop works only while ESPHome is running properly on the ESP32. The ESPHome GPIO switch page warns that right after reset, before ESPHome code runs, GPIO pull-ups may be active and a relay could energize before ESPHome switches it off. ALWAYS_OFF sets the initial state after boot, not the pin state before boot. If the ESP32 hangs or loses power, the microcontroller’s delay does not run either.
Treat those two cases separately. If the ESP32 loses power, its GPIO output disappears, so whether the pump stops depends on the module’s input pull-up or pull-down and on how the relay contacts are wired. If the ESP32 hangs with power still on, the GPIO may stay at its last output level. If that level is “on,” module choice alone cannot stop the pump.
ESPHome’s inverted option exists to match signal polarity; the official GPIO switch page shows a low-active switch configured with inverted: true. Whether you use inverted says nothing about safety. Check the input polarity and wiring of your module, and once assembled, confirm that the pump stops when you pull power from the ESP32 only (pump supply still on) and that it does not start when ESP32 power returns. That test shows behavior at power loss and at boot. This setup does not guarantee stopping when the ESP32 hangs. Limit the damage in case it does not stop, for example by keeping reservoir volume below what the tray can hold.
If you want to stop when soil moisture recovers, you can use wait_for_trigger or wait_template with a timeout instead of delay. Per the Home Assistant script syntax, a wait with timeout proceeds after the time even if the condition is not met. But with continue_on_timeout: false, the script aborts at timeout, and a switch.turn_off written after it will not run, so do not use that setting for stopping a pump. Sensor readings lag as water spreads through the soil, so stopping after a fixed time and then watching for a while is likely easier in practice.
With an off-the-shelf smart plug, connect a USB pump to a USB power adapter and switch the adapter with the plug. The Home Assistant TP-Link Smart Home integration supports Tapo plugs P100, P105, P110, P110M, P115, P125M, P135 and TP15, along with power strips such as the P300 (Tapo requires TP-Link account credentials). How the plug itself times out varies by model. For example, the TP-Link Japan page for the Tapo P110M lists an auto-off timer that stops power after a set time, and the P105 listing has a countdown timer. The integration can also operate settings such as auto-on/off on devices that support them.
We could not confirm in the manufacturer’s material whether that auto-off works when Wi-Fi or the cloud connection is down. If you use a smart plug, enable auto-off in the Tapo app or the integration settings, then test whether it actually stops by stopping Home Assistant or disconnecting the plug from the router during watering. Also limit the damage: keep pump output low and cap the volume at what the tray can hold.
Once you have three or four pots, notifications become a wall of numbers. Moisture, brightness and temperature for each pot tell you nothing about where to start. Passing the state to an LLM and asking for a short “what to do today” makes the notification readable. If you would rather not send household sensor data to an outside service, use a local LLM. Why you might keep an LLM local, and what a home GPU can handle, is covered in our overview of the local AI stack.
Home Assistant has several integrations that connect to a local LLM.
To turn a status summary into a notification, use Home Assistant AI Task. AI Task is not an integration you add by itself; it is a building block that other integrations provide. Give instructions to the ai_task.generate_data action and an AI Task entity generates free text or structured data that you can use in a notification.
actions:
  - action: ai_task.generate_data
    continue_on_error: true
    data:
      task_name: plant status summary
      entity_id: ai_task.local_llm
      instructions: >-
        Read the plant status below and write today's care in two sentences or fewer.
        Use the numbers exactly as given; do not change them.
        Monstera: {{ states('plant.monstera') }},
        soil moisture {{ states('sensor.monstera_soil_moisture') }}%
    response_variable: summary
  - if:
      - condition: template
        value_template: "{{ summary is defined and summary.data is defined }}"
    then:
      - action: notify.mobile_app_my_phone
        data:
          title: Plant status
          message: >-
            {{ summary.data }} (soil moisture {{ states('sensor.monstera_soil_moisture') }}%)
    else:
      - action: notify.mobile_app_my_phone
        data:
          title: Plant status (no summary)
          message: >-
            Monstera: {{ states('plant.monstera') }},
            soil moisture {{ states('sensor.monstera_soil_moisture') }}%
The generated text comes back through response_variable in its data field. By default a Home Assistant script stops at a step that errors. So that the notification does not vanish when the LLM server is down, ai_task.generate_data has continue_on_error: true, and if no summary is received, a numbers-only notification is sent. The docs note that continue_on_error does not ignore configuration errors or errors Home Assistant does not handle, so confirm the fallback actually works using the test table below. The entity_id must be an AI Task entity provided by an LLM integration. Here is the catch: the llama.cpp integration does not provide an AI Task entity, so with only llama.cpp installed there is nothing to target. One local route to an AI Task entity is the Ollama integration. The Ollama integration source in Home Assistant 2026.9.4 contains an AI Task implementation (ai_task.py) and a definition that shows “Add AI task” in the integration settings. The integration documentation does not yet mention AI Task, so after registering your Ollama server, confirm in the integration screen that you can add an AI Task and that an entity starting with ai_task. appears, then put that ID in entity_id above. We have not run this setup on real hardware either.
If you want to run an open model locally before wiring it into Home Assistant, this hands-on guide explains how language models work and how to use them in your own applications.
Using a local LLM as a conversation agent, you could say “water the monstera” and have the pump run. This article still recommends limiting the LLM to summarizing state and writing notifications, and leaving pump switching to ordinary automations.
The reason is that what pump control requires does not match how LLM output behaves. The pump decision must return the same result for the same input every time and must reliably not run when conditions are not met. The level check, run count limit and maximum run time above all exist to keep that property. LLM output can vary for the same input, and when you let it operate devices through tool calls, the responsibility for checking whether a call is correct stays with the caller. Where to put that responsibility for local LLM tool calls is covered in our guide to local LLM tool calling over an OpenAI-compatible API.
For summaries, an LLM mistake only affects the notification text. Even so, it can rewrite numbers or invent problems. That is why the prompt above says to use numbers unchanged, and why the notification includes the raw sensor value next to the summary so the reader can check. The fallback branch and the appended value in the example serve those two purposes.
Finally, parts selection for a low-voltage build. Spec figures are from each manufacturer’s product page. For a worked example of a parts list, LukasK13 ESP-8266-Plant-Watering-V3 on GitHub combines a flow meter, level sensor, capacitive soil sensor and a 12 V pump, a useful wiring reference.
| Part | Example | Spec (manufacturer) | Good for |
|---|---|---|---|
| Submersible pump (small) | DFRobot FIT0800 | 3–6 V DC, 150–370 mA, head 25–45 cm, 80–100 L/h | 5 V systems switched by an ESP32 through a relay |
| Submersible pump (medium) | DFRobot FIT0563 | 6–18 V DC, 65–500 mA, head 60–420 cm, 280–500 L/h | A 12 V supply feeding several pots |
| Submersible pump (tiny) | Adafruit 4546 (horizontal) | 3 V, 100 mA | Prototypes; the maker does not recommend long-term installs |
| Sensor plus pump in one | M5Stack Unit Watering (U101) | Capacitive sensing board, 5 W pump | Fewer wires |
| Level sensor | DFRobot SEN0204 | 5–24 V DC, 500 ms response, IP67 | Non-contact sensing from outside the tank |
| Smart plug | Tapo P105, P110M | Supported by the TP-Link Smart Home integration | Switching the USB pump’s power adapter |
An easy thing to miss is that flow is often far too high for a pot. The FIT0563’s rated flow is 280–500 liters per hour, far more than one or two potted plants need. With a high-flow pump, shorten the run time and use narrower tubing. Adafruit’s 3 V pump is cheap and fine for prototypes, but the maker itself does not recommend it for long-term installs, so treat it as a consumable and keep a spare.
The FIT0563 listing at a Japanese retailer (Switch Science) states “6–12 V” and “550 L/h,” which does not match the manufacturer figures above (6–18 V, 280–500 L/h). We could not determine which spec ships, so if you buy one, ask the retailer about the spec and revision before choosing a power supply.
For the switch between ESP32 and pump, a low-voltage module such as the M5Stack mini relay unit (up to 3 A at 24 V DC) works. Some listings also give an AC rating, but in this build it is not used for switching AC.
If you want to water several pots or zones in sequence, ESPHome has the Sprinkler Controller component. Each valve has its own run_duration, and a pump or main valve can be managed together, much like a garden irrigation controller. It is overkill for one or two pots but worth knowing as zones grow.
Before enabling pump control, confirm each of these. Every one is something you do not want to discover by finding water on the floor.
| Check | Expected behavior | How to test |
|---|---|---|
| Home Assistant restart | Pump stops at the microcontroller’s maximum run time even if Home Assistant restarts mid-watering | Put the tank over a tray and restart Home Assistant during watering |
| Wi-Fi loss | Pump stops on the microcontroller even if commands cannot arrive | Disconnect the ESP32 from the router during watering |
| Microcontroller power loss | Pump stops when ESP32 power is cut | Leave pump power on and unplug only the ESP32 during watering |
| Microcontroller restart | After power returns the pump stays off (also watch whether the relay clicks on briefly at boot) | Plug the ESP32 back in |
| Empty tank | Pump does not start, or stops immediately; Home Assistant sends “Watering skipped” | Run the automation with the tank drained |
| Sensor pulled out | Watering happens once and “Moisture did not recover” arrives | Pull the sensor out so it reads dry |
| Run count limit | No more than two waterings in four hours; “Watering skipped” arrives | During testing only, shorten for and the 20-minute wait. Because of mode: single a new run will not start while one is in progress, so move the value across the threshold only after each run finishes, and confirm sensor.pump_runs_last_4h increased each time |
| LLM server down | A numbers-only notification arrives | Run the automation with the LLM server stopped |
When testing, point the pump outlet at a bucket or tray, somewhere overflow does no harm. The first four checks confirm the pump is not left running when Home Assistant stops, communication drops, or the microcontroller loses power or restarts. This setup can stop the pump only within conditions: by the maximum run time while ESPHome is running, and by the circuit you verified when ESP32 power is lost. It does not guarantee stopping if the ESP32 hangs with power on. Software settings alone cannot guarantee everything. If any check fails, do not enable pump control; go back to notifications only.
The first step is one notification automation on the soil moisture sensor you already have. With a record of how the value moves over a while, you can set the pump run time and threshold from data rather than guesses.