Can AI Diagnose Plants from a Leaf Photo? We Scored 33 Tomato Leaves
swiftwand swiftwand.ai
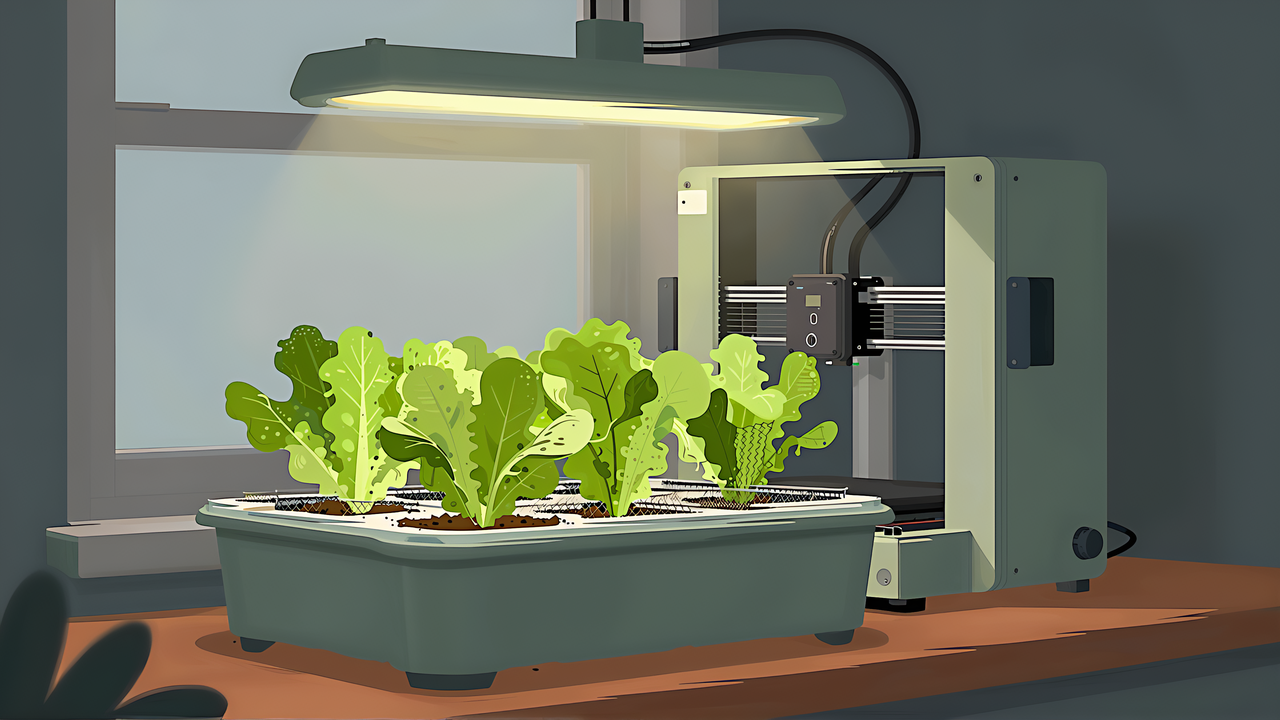
When you set out to build a hydroponic setup from 3D printed parts, the first questions are not about design but about layout. Which container holds the nutrient solution? Do you need a pump? How high should the light hang? What pH and EC should you aim for? Printables and MakerWorld host plenty of net pot and lid models, but printing a model does not give you a working system. Only when container, light and nutrient conditions line up do you get an environment where leafy greens grow.
This article contains affiliate links. As an Amazon Associate, we earn from qualifying purchases.
Using a small tabletop system as the example, this article covers how to split parts between printing and buying, why pumpless Kratky hydroponics is the best first build, how to set grow light output with PPFD and DLI, and pH and EC targets laid side by side from university and public sources. It also shows how to hand design questions and calculations to an AI and what to verify in its answers against the sources.
We did not assemble or grow with this setup. The steps and numbers are based on publicly available material from the University of Hawaii, Cornell University, Oklahoma State University, Oregon State University and others, and on the descriptions accompanying published 3D printable models. Sources are linked where they apply.
Failures in homemade hydroponic setups fall into three groups.
3D printing adds its own cautions. Filament maker Prusa explains that PLA softens above 60 °C and degrades in UV. What you use near lights or for parts constantly touching water should follow from material properties. Also, prints harbor bacteria in their layer grooves, and Prusa does not recommend any filament, PETG included, for direct food contact. If you plan to eat what you grow, think about this at the design stage.
Oregon State University’s “Hydro hints” series (2025) covers NFT, buckets, deep water culture and ebb and flow in separate booklets. The pumpless Kratky method is not part of that series; the originals are papers by B.A. Kratky at the University of Hawaii CTAHR. Here are the four relevant to a small setup. We leave out bucket systems because the series overview says they suit vining and long-season crops.
| Method | How it works | Power | Positioning in sources |
|---|---|---|---|
| Kratky (non-circulating) | All solution goes in before planting. The level drops as roots drink, and roots take oxygen from the moist air gap above the water | None (no electricity, pumps or wicks) | Short-term leafy greens (CTAHR) |
| Deep water culture (DWC) | Roots sit in solution; an air pump and air stone supply oxygen | Air pump | Suits larger spaces (OSU) |
| NFT (nutrient film technique) | A thin film of solution flows continuously down a channel; small root zone; leafy greens and herbs. Horizontal channels need at least a 2% slope | Circulation pump | Short-term crops, vertical systems (OSU) |
| Ebb and flow (flood and drain) | A timer runs the pump to flood a tray with solution and then drain it | Pump and timer | Starting seedlings (OSU) |
Of these four, only Kratky uses neither pump nor electricity. That is a comparison among these four, not a claim that it is the only such method in all of hydroponics.
For DWC, the Cornell greenhouse lettuce handbook says lettuce grows well with dissolved oxygen (DO) of 4 ppm or more, and without aeration DO drops close to 0 ppm. A small system can be aerated with an aquarium air pump and air stone, though it will not reach the DO of pure oxygen systems. The 4 ppm figure comes from the Cornell handbook and we did not confirm it in another source; treat it as a value for Cornell’s greenhouse conditions.
The reason to recommend Kratky hydroponics for a first small system comes down to having no pump. Kratky’s 2009 paper (Three non-circulating hydroponic methods for growing lettuce) summarizes the method as needing no electricity, pumps or wicks, with all solution added before planting.
Without a pump, two things drop off your list.
Kratky has its own rules, though. First, do not raise the water level. The paper says the level may stay the same or fall but must not rise; roots that breathe air will “drown” if submerged. Topping the solution back up to full mid-season submerges roots that have grown into the air gap.
Second, choose crops carefully. The University of Hawaii VC-1 limits the method to crops that need less than 2 gallons (about 7.6 L) of water per plant over the whole season. HG-42 also says it does not suit long-season, thirsty crops like cucumbers or tomatoes. The 2009 paper says leaf and semi-head lettuce are harvested about 6–7 weeks after seeding, while HG-42 says harvest is 5–6 weeks after setup. The starting points differ, so read each source on its own terms.
In the 2009 paper’s 4 L bottle method, the lower 3 cm of the net pot is immersed and the bottle is covered or darkened to prevent algae. That “lower 3 cm” and “light-proof” become the conditions that set the dimensions of a printed lid and the height at which it holds the net pot.
When building a hydroponic system with 3D printing, do not try to print everything. Oregon State’s buckets booklet (EM 9456) says to use food-grade containers, such as HDPE, and to avoid containers previously used for hazardous materials. Meanwhile, Prusa does not recommend prints for direct food contact because of layer grooves, colorants and additives, and wear particles from brass nozzles.
Putting those together gives this split:
| Category | Part | Reason |
|---|---|---|
| Lid (closes the container and holds the net pot) | Must match the container opening; design it to sit above the solution | |
| Light stand or post | You want adjustable height; it does not touch solution | |
| Buy | Solution container | Use a food-grade container (such as HDPE) |
| Buy | Net pots | They touch roots and solution; use store-bought pots with a stated material |
| Buy | pH and EC meters, calibration solutions | Measurement accuracy cannot be printed |
| Buy | Air pump and air stone (DWC only) | Use a finished product as is |
| Buy | Grow light | Choose one with a published PPFD distribution |
| Buy | Nutrients (hydroponic fertilizer) | Mix per the package directions |
Net pots touch both roots and solution. A 3D print offers no basis to show it is a food-grade material, so in this procedure net pots are store-bought with a stated material, and you should check that stated material when buying. Treat printing your own net pots as an experiment without that basis, and we do not recommend it for edible crops.
Use PETG as the default material. Prusa presents PETG as a material also used for waterproof parts, resistant to water and moisture. The same source says PLA is not suited to technical or outdoor use, softens and deforms above 60 °C and degrades in UV. For a stand near a grow light or a lid on a humid container opening, PETG fits better. We could not find manufacturer or public data on how PETG or PLA degrade or leach when immersed in solution for long periods, so this article keeps the material comparison qualitative.
Heat resistance and enclosure design, with a comparison of heat deflection temperatures, are covered in our guide to enclosure heat and ventilation.
For lids and light stands, PETG is the default choice: it handles water and humidity and tolerates more heat than PLA near a lamp.

 ポチップ
ポチップPrintable models for hydroponics include jar lids, net pots and NFT brackets. The table reflects licenses and descriptions checked on each page on 2026-09-28. We have not printed any of them.
| Model | Host | Contents | License |
|---|---|---|---|
| Mason Jar Kratky Hydroponic Lid | Printables | Lid for regular-mouth mason jars; holds a 1.5 inch rockwool cube; no supports | CC BY-NC-SA (non-commercial) |
| Hydroponic Net Pot Lid | Printables | Screws onto 8 cm, 6-lug threaded jars; no supports needed | CC BY-NC-SA (non-commercial) |
| Mason Jar Net Pot | Printables | 3 inch net pot for wide-mouth jars; no supports | CC BY |
| 50mm / 2in Hydroponic Net Cup | Printables | 50 mm net cup | CC BY |
| Hydroponic NFT Downspout Horizontal Bracket | Printables | Bracket for using a US 2×3 inch downspout as an NFT channel | CC BY-SA |
| Hydroponic Mason Jar Kit | MakerWorld | Adapters for wide and regular mouth; the net cup needs supports | Standard Digital File License (not CC) |
| oya-kratky | GitHub | A set of printable parts for Kratky | MIT (last updated 2021-11-15; no longer updated) |
Two license points. CC BY-NC-SA models are non-commercial only, so you cannot sell printed parts. MakerWorld’s Standard Digital File License is a separate set of terms from Creative Commons; check its conditions on the model page. The NFT bracket fits US downspout sizes; we did not check it against other markets’ downspouts. This is a general summary of licenses, not legal advice.
Both lid models note light blocking in their descriptions. The Mason Jar Kratky Hydroponic Lid suggests tape or paint to block light so algae does not grow on roots, and the Hydroponic Net Pot Lid suggests covering the glass jar with a sock or paper to prevent algae. The designers themselves assume light is a problem.
Whether you use a published model or design your own, the requirements for lid and net pot follow from the sources.
First, block light. Oregon State’s DWC booklet says to cover the water surface with opaque material and minimize gaps to reduce evaporation and algae. Print the lid in a dark color and hold it up to a lit lamp to confirm no light passes before use. Cover the container sides too; HG-42 suggests painting clear bottles or covering them with a bag.
Second, close the gaps. HG-42 warns that a gap between net pot and bottle lets mosquitoes in to breed in the solution. Measure the outer diameter of the store-bought net pot you will use and design the lid hole allowing for print tolerance. For a lid that screws onto a jar, see our guide to 3D printed threads.
Third, immersion depth and level. In the 2009 paper’s 4 L bottle method the lower 3 cm of the net pot is immersed. Work out the initial solution volume from that depth. After that, let the level fall and do not top it back up; that is the premise of Kratky.
Fourth, strength and orientation. The lid gets put on and taken off many times. Threads and clips crack more or less easily depending on layer direction, so decide wall count and print orientation up front; our strength design guide covers the thinking.
Indoors, light directly limits growth. Think not in lux but in PPFD (µmol·m⁻²·s⁻¹), the instantaneous intensity of light plants can use, and DLI (mol·m⁻²·d⁻¹), its daily total. Why lux is a poor plant metric and how to measure window light is covered in our winter indoor growing plan, so here we focus on the calculation for choosing a light.
Purdue (HO-238-W) explains that multiplying the 24-hour average PPFD by 0.0864 (86,400 seconds per day divided by 1,000,000) gives DLI. For an LED on for a fixed number of hours, the same definition gives:
DLI = PPFD × hours on × 3,600 ÷ 1,000,000
For example, PPFD 250 µmol·m⁻²·s⁻¹ for 16 hours gives 250 × 16 × 3,600 ÷ 1,000,000 = 14.4 mol·m⁻²·d⁻¹. You can also work back from a target DLI. To reach DLI 12.9 for basil with 16 hours of light, you need 12.9 × 1,000,000 ÷ (16 × 3,600), or about 224 µmol·m⁻²·s⁻¹.
Reported targets for lettuce and basil, with their conditions:
| Crop | Source | Value | Conditions |
|---|---|---|---|
| Lettuce | Cornell (greenhouse lettuce handbook) | Recommended DLI 17 mol·m⁻²·d⁻¹ | Best value for the Boston bibb type used; requires downward airflow, and without it they could not exceed 12 |
| Lettuce and basil | Pennisi et al. (2020) | Yield rose up to PPFD 250 (DLI 14.4); no gain at 300 | Indoor, red and blue LEDs, 16 h photoperiod, 24 °C, PPFD 100–300 compared |
| Basil | Dou et al. (2018) | DLI 12.9 mol·m⁻²·d⁻¹ proposed | Indoor vertical farming context; white fluorescent lamps at five levels from DLI 9.3 to 17.8 |
Purdue classes DLI 6–12 as medium light, 12–18 as high and above 18 as very high. The values above put both lettuce and basil on the high side.
When choosing a grow light, look not at wattage but at whether the manufacturer publishes PPFD at each distance. PPFD changes greatly with distance from the source, so the same light gives different DLI depending on how high it hangs. Making the printed light stand height-adjustable is exactly so you can set that distance.
One example of a supplemental light is a screw-in full spectrum bulb for an E26 socket. PPFD changes with hanging height, so check the published PPFD at distance before settling the height.
 ポチップ
ポチップYou measure two things in the solution: pH and EC. pH affects how easily nutrients are absorbed. The University of Hawaii VC-1 notes that high pH makes manganese, copper, zinc and iron less available, and low pH does the same for phosphorus, potassium, calcium and magnesium. EC (electrical conductivity) indicates solution strength.
Targets vary between sources. The table lists four sources without merging them into one value.
| Source | Lettuce pH | Lettuce EC | Basil pH | Basil EC |
|---|---|---|---|---|
| Cornell (greenhouse DWC) | 5.8 optimal, 5.6–6.0 acceptable | 1150–1250 µS/cm above source water | — | — |
| University of Hawaii VC-1 (Kratky) | 5.5–6.5 (solutions in general) | Around 1.5 mS/cm, from 1 in hot weather to 2.5 in cool | — | — |
| Oklahoma State HLA-6722 Table 2 | 6.0–7.0 | 1.2–1.8 mS/cm | 5.5–6.0 | 1.0–1.6 mS/cm |
| Virginia Tech SPES-464 (DWC; pH for crops in general, EC for leafy greens in general) | 5.5–6.2 | 1.2–2.0 mS/cm | — | — |
Separately from Table 2, the Oklahoma State text says to keep the solution at pH 5–6 (usually 5.5) and the root zone at 6–6.5. Do not set solution pH from Table 2 alone.
1 mS/cm equals 1,000 µS/cm. The Cornell value is above source water, so measure your tap water EC first and subtract it, as the Cornell handbook states explicitly.
Values disagree because the sources assume different settings: commercial greenhouse or small home container, DWC or Kratky, hot or cool climate. The Hawaii recommendation to vary EC between hot and cool seasons is one example. Pick the source closest to your setup and stay within its range. If a table range and your fertilizer label disagree, follow the label.
Mix the solution itself from hydroponic fertilizer per the package directions. Virginia Tech explains that mixing rates are set by the fertilizer maker for each crop and printed on the package. This article does not recommend specific brands.
Water temperature has an upper limit too. Cornell keeps it at 25 °C or below, Oklahoma State gives 72–75 °F (about 22–24 °C) as optimal, and Oregon State says to keep solution cool and out of the sun. Avoid placements where direct window sun hits the container.
Calibrate pH and EC meters before use. Oklahoma State says to calibrate the pH meter with pH 4, 7 and 10 buffers and the EC meter with its calibration solution; many EC calibration solutions are 1.41 mS/cm. The exact steps differ by model, so follow your meter’s manual. VC-1 notes that every pH meter needs periodic calibration and that pH electrodes tend to wear out sooner than EC meters.
The order matters too. Oklahoma State says to bring EC into range first and then measure pH. If EC is above target, dilute with water; if below, add concentrated solution. Then check pH.
Frequency varies by source. Oklahoma State recommends measuring pH and EC daily; Virginia Tech says two or three times a week. So the range is from daily to a few times a week. Oklahoma State also recommends replacing the entire solution every two weeks. Kratky, however, assumes all solution goes in at the start and the level is never raised. Whether to replace or top up depends on the method, so follow the source for the method you chose.
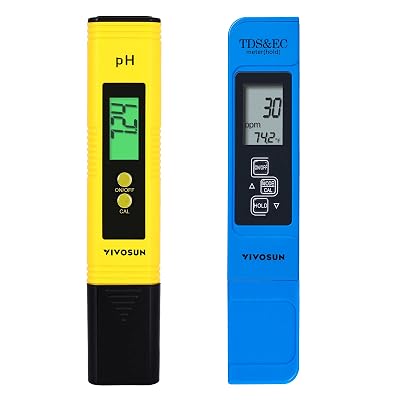
A pH pen paired with a TDS/EC pen is an inexpensive way to start. Check whether calibration solutions are included or must be bought separately.
 ポチップ
ポチップThere are many conditions here and the sources are scattered. A chat AI such as Claude or ChatGPT is useful for organizing them into a system plan. Three jobs suit it well:
Give the conditions as a table first. For example:
I am planning a small hydroponic setup.
Method: Kratky (no pump)
Container: food-grade HDPE, opening inner diameter 80 mm, height 150 mm
Container volume and body shape: (measure and fill in, e.g. volume X L, cylindrical body)
Net pot: store-bought, outer diameter X mm, length X mm, protrudes X mm above the lid
Crop: one leaf lettuce
Light: LED grow light, 16 hours on
What I want to know:
1. The PPFD needed for a target DLI of 14.4 mol/m2/d (show the formula)
2. The initial water level for immersing the lower 3 cm of the net pot
3. A list of parts to 3D print and parts to buy
Name the source for every number, and mark numbers without a source as unverified.
If a condition needed for a calculation is missing, ask me instead of guessing.
Do not use the answer as is. Check these points against the sources:
What AI speeds up is organizing conditions and doing arithmetic. Checking where numbers come from is done by a person opening the originals, after having the AI name its sources.
Based on the sources and the published model descriptions, here is an order for building a small Kratky setup. The University of Hawaii HG-42 (single bottle) and University of Florida HS184 (floating raft) are useful references for the steps.
If you move to DWC, add an air pump and air stone. The Oregon State and Virginia Tech sources explain the configuration and measurement steps. Use a finished air pump as is and do not modify its power wiring. We found no public guidance on how much air pump capacity is needed; compare container volume with the product’s rated tank size.
For bought parts, look at the following. We do not name specific brands or prices here.
Comparing with finished hydroponic kits is also worthwhile. Seeing how a kit integrates light, pump and container makes it easier to judge which parts are worth replacing with prints.
Before printing any model, measure your container opening and pick one source for your chosen method. The lid dimensions and light height follow from there.