AI 3D Print Real-Time Correction: The Closed-Loop Revolution That Eliminates Print Failures
swiftwand swiftwand.ai
Push acceleration past 5,000 mm/s² and the corners of every test cube start showing ringing. Tighten belts, swap to lighter rails, redesign the gantry — none of it changes the underlying physics. Input Shaping is the algorithm that does change it: a control-theory technique that injects a counter-impulse into the motion command so the printer’s frame is no longer excited at its resonant frequency. Klipper 0.13.0 (April 2025) shipped a brand-new sweeping vibrations test that makes Input Shaping tuning more accurate and faster than ever, and 2026 is the moment when “you should be running Input Shaping on every Klipper printer” goes from advice to defaults. This guide covers the physics, the accelerometer choices, how to actually run sweeping vibrations on Klipper 0.13.0, and how to pick between ZV/MZV/EI/2HUMP/3HUMP shapers — all sourced from the Klipper docs and the official 0.13.0 release notes.
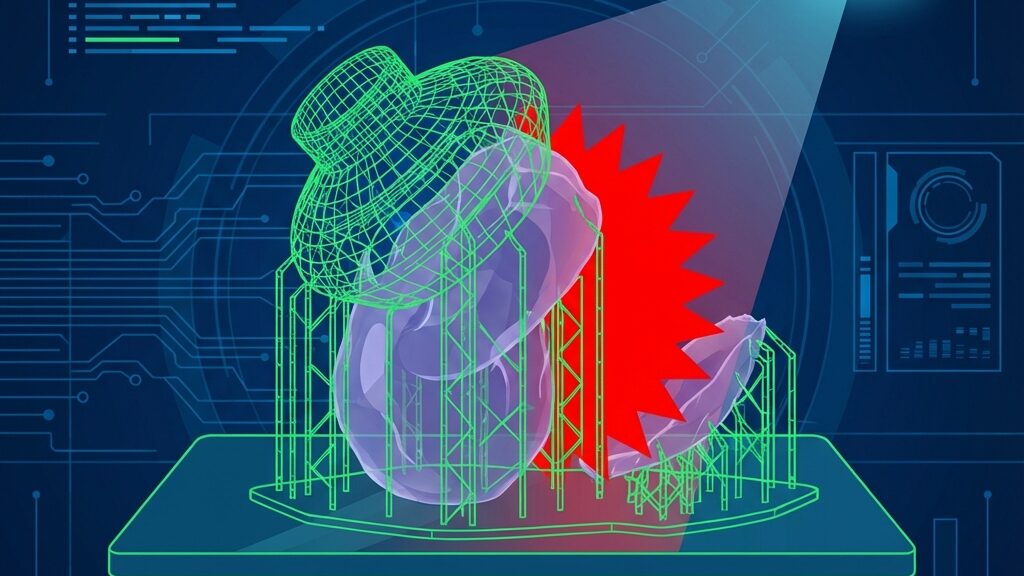
A 3D printer’s frame is a damped harmonic oscillator. The toolhead, the gantry rails, the belts, even the bed — they each have a natural frequency at which they ring. When the motion controller demands a sharp acceleration step (zero to 10,000 mm/s² in microseconds), that step contains energy at all frequencies, including the frame’s resonance. The frame stores that energy as oscillation, and the oscillation modulates the toolhead’s position. The printed result: a ghost of every sharp feature, repeated for as many oscillation periods as the frame takes to dissipate.
You can’t engineer this away by stiffening the frame past a point. A heavier gantry just shifts the resonance lower; a lighter gantry shifts it higher. Either way, you’re still exciting it. The Klipper docs are explicit about this: “Input shaping uses the principle of destructive interference to cancel residual vibration.” Schedule a counter-impulse at exactly half the oscillation period and exactly the right amplitude, and the second impulse cancels what the first one excited. The frame still moves; it just doesn’t ring afterward.
The key implication for a Klipper user: Input Shaping is not a print-quality knob you tune empirically. It’s a control system that needs to know your printer’s actual resonant frequency for X and Y separately, measured with an accelerometer. Skip the measurement step and you’re guessing. Measure it once and the algorithm does the rest, in real time, on every move.
Marlin 2.1 has Input Shaper as well, but the workflow is different: edit configuration.h with the measured frequency, recompile, reflash. Klipper lets you type the measured frequency directly into Mainsail or your printer.cfg and reload. That’s 90% of the reason Klipper users converge on Input Shaping faster than Marlin users do.
One important nuance: Input Shaping smooths the acceleration profile, which inevitably softens very small features. If you push aggressive shapers like 3HUMP_EI, sub-millimeter detail loses crispness. The trade-off between residual ringing and feature softness is exactly what the shaper-type table below addresses.
Klipper officially supports four accelerometers for resonance measurement. Each has a different sweet spot.
| Sensor | Bus | Characteristics | Availability |
|---|---|---|---|
| ADXL345 (Analog Devices) | SPI | De facto industry standard for 3D printing. Klipper community examples are the most plentiful | BIGTREETECH ADXL345 V2.0 and many others. Single-digit USD |
| MPU-9250 (InvenSense) | I2C (400 kbit/s fast mode required) | 9-axis IMU, originally for drones and VR. Klipper uses only the accelerometer portion | Many DIY modules available |
| LIS2DW (STMicroelectronics) | SPI or I2C | Higher sensitivity than ADXL345, lower noise, better thermal stability. Note an active community discussion about its 200 Hz Nyquist limit caused by an internal 400 Hz filter | On BIGTREETECH and similar Klipper-targeted boards |
| LIS3DH (STMicroelectronics) | SPI or I2C | Industrial-grade general-purpose sensor. Officially supported in Klipper | Less common in distribution than ADXL345 |
For a first-time setup in 2026, the ADXL345 is still the right answer. The community has the most documented configs, the noise floor is well-understood, and the price is in single digits. The LIS2DW is the better sensor on paper, and if you’re building a Voron 2.4 R2 with a more recent CAN-bus toolhead board you may already have one — but be aware of the Nyquist discussion in the Klipper community before pushing the maximum frequency range.
MPU-9250 is fine if you already have one in a drawer, but the I2C bus has to be configured for the 400 kbit/s fast mode or the data rate falls below what Input Shaping needs. The LIS3DH is comparable to LIS2DW but harder to source.
Mounting matters as much as the sensor choice. The accelerometer has to be rigidly attached to the toolhead during X-axis tests and to the bed during Y-axis tests. A flexible PCB connection or a loose mount adds its own resonance and corrupts the measurement. Use the official Klipper mounts in the docs or a known-good Voron design.
Before you can run a resonance test, the Klipper host (Raspberry Pi or equivalent) needs three things: SPI enabled in the kernel, the right Python packages installed, and the accelerometer wired in. The official Klipper docs (Measuring Resonances) cover the wiring; the host-side prep is a one-time install.
On a Pi running MainsailOS, enable SPI from raspi-config or the boot config, then install the Python dependencies:
sudo apt update
sudo apt install -y python3-numpy python3-matplotlib libatlas-base-dev
~/klippy-env/bin/pip install -v numpy matplotlib
The matplotlib install on a Pi is slow (sometimes 10+ minutes). It’s a one-time cost. After installation, add the accelerometer config to your printer.cfg following the Klipper sample, restart Klipper, and verify the connection with ACCELEROMETER_QUERY.
A common gotcha: with the Raspberry Pi 5, several SPI-related kernel changes mean the older “use Pi as MCU for the accelerometer” setup behaves differently than on Pi 4. Klipper’s 0.13.0 release notes include adjustments here, and most users now wire the accelerometer to a control-board SPI port (BTT Manta M8P, SKR Mini E3 V3.0, EBB on CAN) rather than to the Pi itself. Use the path that’s documented for your specific board.
Once ACCELEROMETER_QUERY reports sensible numbers (around 9.8 m/s² of gravitational acceleration on the appropriate axis), the host is ready and the rest of the work happens through Mainsail or Fluidd.
Until 0.12.x, Klipper’s resonance test stepped through discrete frequencies (one shake per frequency) and measured the response at each. 0.13.0 replaces this with a continuous frequency sweep: the toolhead is driven through the entire frequency range smoothly, and the accelerometer captures the response across the sweep. The Klipper 0.13.0 release notes describe this directly as the new default test method.
In practice this means two things. First, the test runs faster — typical X-axis sweeps complete in under 90 seconds, where the discrete-frequency version sometimes took 3–4 minutes. Second, the resonance peak resolution is higher, because the accelerometer captures continuous data instead of binned samples.
Run the test from Mainsail or via SSH:
TEST_RESONANCES AXIS=X
TEST_RESONANCES AXIS=Y
Klipper writes the raw data to /tmp/resonances_x_*.csv and /tmp/resonances_y_*.csv, and the standard scripts/calibrate_shaper.py tool processes them into a recommended shaper type and frequency. Mainsail surfaces the resulting plot directly in the browser; you click through to see the resonance peak per axis, and the recommended shaper appears beneath.
The shaper type determines how aggressively Input Shaping smooths the motion profile. The Klipper docs ship six options. Here’s how they compare:
| Shaper | Characteristics | Recommended use |
|---|---|---|
| ZV | Minimal smoothing, sharpness-first | When the resonance frequency is measured precisely and you want maximum detail sharpness |
| MZV | Balanced. Practical vibration reduction with minimum smoothing | Recommended as the first try on most printers. The Klipper docs recommend this default |
| ZVD | Convolution of two ZV shapers | Behaves similarly to EI; in practice users substitute EI |
| EI | Robust against drift in resonance frequency | When temperature or wear shifts the resonance, or for long-term operation |
| 2HUMP_EI | Handles two resonance peaks | Frames with both a primary and secondary resonance, composite-structure machines |
| 3HUMP_EI | Suppresses vibration over a wide frequency band | Per the official docs, with shaper_freq=50 Hz, vibration is reduced to under 5 percent in the 27.5 Hz to 75 Hz range |
Practical guidance: start with MZV. If calibrate_shaper.py recommends MZV, use it. If it recommends EI because the resonance peak is broad or noisy, accept EI. Only switch to 2HUMP or 3HUMP if you see two clear peaks in the resonance plot — otherwise the extra smoothing reduces fine-detail crispness without measurable benefit.
You set the chosen shaper and frequency in printer.cfg:
[input_shaper]
shaper_type_x: mzv
shaper_freq_x: 56.4
shaper_type_y: ei
shaper_freq_y: 41.2
After saving and restarting Klipper, run a ringing-test print (the standard test STL is in the docs). Compare the same print with and without the shaper — the difference is usually obvious within 5 mm of the corner.
For Voron builders and anyone who wants to push past the basic test, Klippain Shake&Tune is the canonical advanced tuning suite. It’s a Klipper plug-in that adds richer measurement modes, automated post-processing, and visual reports far beyond the stock calibrate_shaper.py.
The key features that justify the install are the belt tension comparison (one accelerometer measurement that surfaces uneven belt tension) and the input shaper graph that overlays multiple shapers on the same plot for direct comparison. For a Voron 2.4 R2, the belt tension check alone is worth the install — uneven belt tension causes ringing at low frequencies that no shaper compensates well.
Install via KIAUH (Klippain Shake&Tune is in the recommended-plugins list) or directly from the Klippain repo on GitHub. After install, new G-code commands like SHAKETUNE and BELTS_SHAPER_CALIBRATION become available.
A practical workflow on a Voron-class printer: run BELTS_SHAPER_CALIBRATION first, fix any uneven belt tension, then run the standard sweeping vibrations test. This sequence catches most “I tuned Input Shaping perfectly but ringing came back” issues.

Most Input Shaping failures fall into a small set of categories. Recognizing the pattern saves hours.
“The plot is noisy and there’s no clear peak.” Almost always a mounting problem. The accelerometer must be rigidly attached to the toolhead or bed. A flexible cable, a wobbly print-mount, or a poorly seated socket adds its own resonance. Re-mount with rigid fasteners and rerun.
“ACCELEROMETER_QUERY shows zeros or NaN.“ SPI bus issue. Check wiring, check that the chip select line matches the config, check the SPI bus speed. On Pi 5, double-check the kernel SPI driver matches what your Klipper config expects.
“The recommended shaper is fine, but ringing is still visible.” Frame is moving as a system. Check belt tension on the cause-side (X belt for X ringing, Y belt for Y ringing). Also check whether the bed itself is vibrating; on bed-slinger printers, the bed mass can dominate the Y-axis resonance and a bed-mounted accelerometer is required.
“Sharp features look soft after Input Shaping.” Probably 3HUMP_EI or excessive smoothing. Switch to MZV with a verified frequency and you should regain detail without losing ringing suppression. Conversely, if you don’t see ringing now and the shaper is suppressing visible detail, you may not need shaping at all on that axis.

Resonance frequency is not a permanent number. It drifts with temperature, wear, belt age, and mass changes (a heavier hotend, an added cooling duct, a different bed surface). For a printer used heavily, re-running the resonance test every 2–3 months is reasonable maintenance. After major mods (toolhead changes, bed changes), re-run immediately.
Some signs that Input Shaping is “too much”: small features lose definition that should be sharp, fine text turns illegible, and you can see a slight rounding on what should be hard edges. The fix is to switch to a less aggressive shaper (3HUMP_EI → EI → MZV → ZV in order of decreasing smoothing) or to slightly reduce shaper_freq_*.
“Where exactly is my limiting axis” is also worth investigating. Many Klipper printers end up X-axis-bound (the X belt is shorter and more prone to high-frequency ringing than the Y belt) and others end up Y-axis-bound. The accelerometer plot tells you immediately, and you can tune each axis independently. Modern Voron Trident builds frequently end up with X around 60–80 Hz and Y around 40–55 Hz.
A subtle gotcha: Input Shaping interacts with Pressure Advance. Both modify the motion command, and both are easier to tune in isolation. The standard order is — measure resonance → set Input Shaping → run Pressure Advance test → set Pressure Advance. Doing them in reverse can confound the Pressure Advance result because Input Shaping changes the effective acceleration profile.
Finally, remember that the Klipper docs provide a full reference. The “Measuring Resonances” page and the “Resonance Compensation” page are the authoritative source for parameters and edge cases. Anything in this guide that contradicts those docs should defer to the docs.
The biggest mindset shift for a Klipper user moving into Input Shaping is treating it as a physics problem, not a print-quality knob. Every Klipper machine has a measurable resonant frequency for X and Y. Once you measure it, the algorithm cancels the corresponding oscillation. There’s no empirical guessing — and no, “trying different shapers and seeing which looks best” is not the right approach.
Klipper 0.13.0’s sweeping vibrations test cuts the measurement to under two minutes per axis, and the recommended shaper from calibrate_shaper.py is right ~80% of the time. That leaves you with one configuration write and one save-and-restart. The expected result is dramatically reduced ringing on every print, not just the test prints, with no sacrifice in maximum acceleration.
If you have a Voron Trident or 2.4 R2, layer Klippain Shake&Tune on top for belt-tension comparison and per-shaper visualization. If you have an Ender 3 with the BTT SKR Mini E3 V3.0 board, the standard Klipper sweeping vibrations test is plenty.
Up next: Pressure Advance auto-tuning — the second of the two calibration steps every Klipper printer should run, and the one that eliminates corner squish on every test print. Together, Input Shaping and Pressure Advance are the practical reason 2026 is a great year to have moved to Klipper.